Introduction
This is a series of short articles designed to help people create an accurate impression of a German soldier, without wasting money on unnecessary or substandard items. It is not a complete guide to every piece of German kit issued, and neither is it saying that you can’t attend a WWII airsoft event until you’ve got everything. On the contrary, at almost all events, people will offer kit (and even weapons) for free loan. So take advantage of any such offers, and build your kit up bit by bit. This guide does not list all kit suppliers, but just the ones I recommend, after 5 years of buying from all over the place. [pullquote_right]generic and accurate – the two can go hand in hand[/pullquote_right]Approximately 80% of German fighting troops were just regular army, or Heer. So, whilst you might think it would be cool to portray the élite units, as with every other nation, the bog-standard army soldier, or Landser, is the classic German impression. Things have changed a lot since I partook in my first WWII airsoft event in 2007 – Comrades in Arms’ Arnhem. I had very little knowledge of German uniforms and how they were worn, and what was a typical look. Since then, I have taken part in over 25 WWII airsoft events, done a lot of research, and as time has gone on, I have changed (and simplified) my kit, to make it more generic and accurate. Yes, generic and accurate – the two can go hand in hand. The best advice given me early on was to buy the Feldgrau (field grey) wool uniform first, because this is the basis of all Heer (and Waffen SS) impressions. Unlike the Waffen SS, the Heer did not commonly make use of camouflage items; the Feldgrau wool uniform was worn uncamouflaged by the large majority of troops. [pullquote_left]Basic Infanterie is probably the best impression to start with[/pullquote_left]Like many other beginners, I wasted a lot of money on camo helmet covers and smocks (and hideous amounts of bling!), only to ditch them within a few months, realising that they were the exception, rather than the norm. The word “uniform” means to be the same – so if you’re trying to portray a WWII soldier, but want to look “different” from the rest, then you’re completely missing the point. Basic Infanterie is probably the best impression to start with, because that will fit in with pretty much any event scenario, and allow you to be part of a unit, rather than standing out from the crowd, like a sore thumb. If you decide you want to portray a blinged-up Major from a Hermann Gőring Division assault gun crew (for example), that’s entirely your choice, but I would suggest you have completely the wrong mindset required for WWII airsoft, so don’t bother reading any further!Back to top of page
Contents
Part 1: Feldgrau uniform
Part 2: Headwear, leatherwear, footwear
Part 3: Field kit and weapons
Part 4: Lightweight uniforms and shirts
Part 1: Feldgrau uniform
Wool? But I get really itchy and hot!
Yeah, yeah, me too. I had eczema as a kid (and an adult), and the idea of wearing wool seemed madness. However, it has really never troubled me wearing it in WWII airsoft. Most modern wool reproduction uniforms are much softer than their WWII counterparts would have been. I don’t find it that hot either, because most proper events do not require you to run around like an open day noob. (I will cover non-wool Heer uniforms in another article.) OK, so you’re wanting to buy a Feldgrau uniform, but when you look at the various sellers, there are many different types – what should you get? Post-war enthusiasts assigned the different types with an M-prefix, followed by the approximate year of manufacture. e.g. M36, manufactured in 1936, etc. Well, this is a modern naming standard, and is very approximate. The M36 tunic was issued throughout the whole war, and a tunic was never replaced unless it was falling apart, such was the shortage of materials in the Third Reich. (Some people actually think that all the M36s were ditched in 1940, and everyone was issued with an M40 tunic, etc, etc – er… no, that was not the case!)
Wool uniform variations
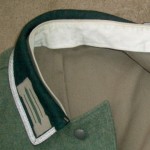
The first tunic issued was what is referred to as the M36. It had a bottle green collar, with pleated (boxed) pockets and scalloped flaps. It was manufactured from about 1935 to 1941, and issued throughout the whole war.
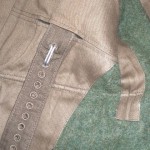
With five buttons down the front, it also had internal suspenders, which ran over both shoulders, and allowed the use of belt hooks to support the weight of the belt and equipment.
Corresponding holes in the tunic matched up to put the belt hooks through.
Up until at least 1942, troops continued make use of belt hooks without Y-straps, to support their field kit. So, an M36 tunic is fine for representing any Heer soldier throughout the war.
The next variant is known as the M40, which was identical to the M36, except the bottle green collar was done away with, in favour of the wool Feldgrau collar. Produced from 1938 to 1943, it was issued throughout the war, and also had internal suspenders like the M36.
The M41 was identical to the M40, but because of the increasingly poor quality of wool available, featured 6 buttons down the front, and was issued from 1941 to the end of the war.
The M42 did away with the pleated pockets and the internal suspenders, and was issued from 1942 onwards. It still had the three holes which you could use with belt hooks, but internally only attached to small tabs inside the tunic. By now, the use of Y-straps was assumed, to take the increasing weight of the belt kit.
The M43 did away with the scalloped pockets in favour of a straight cut, to save material, and was issued from 1943 onwards.
In 1944, the Germans introduced the M44 tunic and trousers. This was a complete departure from all previous models, and was similar to the British battledress design, incorporating a very short tunic which did not extend below the waist.
Trouser variations
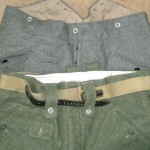
The first trousers issued were M34/36 Steingrau (stone grey) in colour, and were seen in action up until about 1942 on the eastern front. (They were also issued very late war, when stocks of everything were running out.) Straight-legged, with creases down the front, they were similar in cut to the M37/40 trousers, which only differed in colour – Feldgrau to match the tunic. From late 42 onwards, the M42/43 trousers were introduced, featuring reinforced seat, belt loops and tapered ankles. Note that whilst the Germans did use a canvas belt from about 42 onwards, all trousers are best worn with braces. Finally, the M44 trousers were issued with the M44 tunic. In a surprising throwback to earlier years, they were straight-legged with creases down the front.
What insignia do I need?
As already mentioned, when I purchased my first uniform, like many other people, I went completely over the top with insignia – I actually spent the same amount on insignia as on the uniform itself! The only insignia you actually need is a Heer chest eagle, Litzen (collar tabs) and shoulderboards – the latter are usually included with the uniform. And that is all you need.
Insignia variants
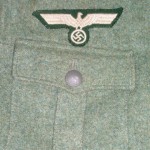
Chest eagles were either embroidered or woven-style (known as BeVo). Either is correct, although the embroidered insignia was not nearly as common as the war progressed. The eagle is sewn onto the right side of the tunic, above the upper pocket.
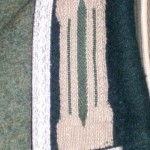
Collar tabs were also either embroidered and mounted on a felt base, or BeVo. Here is where we can choose between a generic impression and a more specific one. The Germans used different colours (known as Waffenfarbe) to distinguish different types of troops. This system was used throughout the war on shoulderboards, in the form of piping around the edges – Infanterie used white, for example. Initially, Waffenfarbe was also used on the collar tabs, but even before the war started, generic BeVo collar tabs (i.e. without Waffenfarbe) were being issued. So, either are correct, but for a classic (and generic) look, BeVo collar tabs are the way to go. That way, if you decide to change your impression from (say) Infanterie to Pioniere, all you need do is change your shoulderboards from white to black piping.
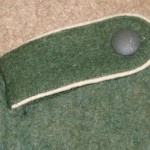
Shoulderboards were either made of bottle green or Feldgrau-coloured material. They do not have to match the tunic collar (i.e. M36 with bottle green collar does not require bottle green shoulderboards) – plenty of photographic evidence shows this to be the case.
Where is the best place to buy from?
From past experience, I think it’s best to buy major purchases – such as your uniform – from a UK-based supplier. You might find stuff cheaper on ebay, but if you have to return it for whatever reason, it becomes a bit of a nightmare – not to mention postage and possible customs charges. Also, you can never be sure of the quality. UK suppliers do not want their reputation sullied, so will not sell cheap rubbish. I would personally recommend www.militaria-net.co.uk because they do good deals on buying both the tunic and trousers together.
Jump to top of page
Jump to start of Part 1: Feldgrau uniform
Jump to start of Part 3: Field kit and weapons
Jump to start of Part 4: Lightweight uniforms and shirts
Part 2: Headwear, leatherwear, footwear
Headwear
So, what did the German soldier wear on his head? Let’s remind ourselves we are looking to portray a soldier in combat, so frankly, the soft cap should be ignored in favour of the Stahlhelm (steel helmet). Yes, maybe the uber-élite sniper might have worn a ski cap (he did in the film), and yes you may well have seen many pictures of cap-wearing Germans – but almost never in a combat situation. For that reason, I am not going to mention soft caps in any detail at all.
Helmet variants
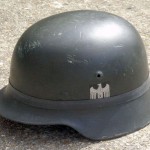
There were three models of helmet used by Heer (and Waffen SS) troops: The M35, M40 and M42. The M35 was a good quality helmet and was the helmet that all front line troops were wearing at the beginning of the war. However, it was expensive to make, so a cheaper, slightly rougher M40 was produced in 1940, although it was difficult to distinguish the two, and I don’t recall any seller referring to an M40; only M35 and M42. The M42 was a rougher version still, and is visibly distinguishable by the distinct rim around the helmet edge, instead of the steel being folded up underneath. Reproduction helmets can be bought from all the usual suppliers: www.militaria-net.co.uk, www.epicmilitaria.com, etc. Many of these are produced in the far east, and some other suppliers sell helmets that are not quite the right shape. If you want a really top class helmet, www.richardaunderwood.com is the place to go. He only uses original (but newly-painted) shells, to which he fits new liners, and decals of your choice.
Colour and insignia
In 1939, the colour of Heer M35s was referred to as “Apfelgrün” (apple green), and the helmet had a red, white and black shield decal on the left side, and a black and silver eagle decal on the right. By 1940, the colour had changed to a slightly darker green, and most repro helmets you buy are roughly this colour. The shield decal was also removed about this time, being deemed as too highly visible – troops would just scratch them off. Some time mid-war, the eagle decal was also ordered to be removed, although some are still visible late war. Helmets were whitewashed in winter, and sprayed Dunkelgelb (“dark yellow”) in the desert. The other famous colour scheme was used by some troops in Normandy, where they painted random patterns of whatever (usually vehicle) paint that they could get their hands on – usually dark green, terracotta and Dunkelgelb. In addition, sand was sprinkled on the wet paint, which reduced the shine of the smooth metal.
Camouflaging helmets
The Splittertarn (and later) Sumftarn helmet covers were introduced mid-to-late war, but were not very common, even in élite divisions like “GrossDeutschland”. (In the definitive, picture-laden GD book “God, Honour, Fatherland”, there are only three soldiers pictured with Splittertarn covers, out of 100s of pictures, and only one squad of 4 men wearing Splittertarn or Sumftarn smocks. None of these pictures are before 1944.) Far more common were various field modifications, like using rings of tyre inner tube or the breadbag strap to stick foliage under, in an attempt to break up the distinctive lines of the helmet. Often, soldiers would smear mud all over their helmets, to reduce the shine.The belt, buckle and Y-straps
The Heer buckle has “GOTT MIT UNS” inscribed on it (God with us), and is different to the buckles used by the Waffen SS and the Luftwaffe. Silver in colour, later war some troops painted it green to reduce visibility. The standard belt was made of leather and black in colour (early Luftwaffe troops had brown leather). In 1941, the Afrika Korps were issued with a green canvas belt, and corresponding canvas Y-straps. Since it was cheaper than leather, the canvas webbing eventually found its way to units on all fronts. However, leather belt and Y-straps were far more common, even at the end of the war. Belt, buckle and Y-straps are available from Richard Underwood, Militaria-net or Epic Militaria.How to wear it
How to wear a belt? Bit obvious, ain’t it? Well, not necessarily – I have seen plenty of people wearing it wrong. It is not worn on the hips, it is not a waist belt; it is worn about belly button height. To keep it this height, I recommend using belt hooks and Y-straps (if you’re using Y-straps at all). From about 1942 onwards, almost all soldiers wore Y-straps, to support the increasing weight of the belt kit.
Footwear
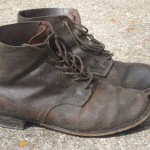
The “Marschstiefel”, or marching boots (known to most as jackboots) are what all troops were issued early to mid-war, and were worn throughout the conflict. Pre-war Marschstiefel had taller shafts, but the wartime economy required them to be slightly shorter, to save leather. There are a number of different sources for jackboots, with www.militaria-net.co.uk doing very good value reproductions, including hobnails. www.richardaunderwood.com do post-war boots without hobnails, in addition to good reproductions. (For top quality reproductions, handmade boots from Germany or the Czech Republic are best. Look on www.panzergrenadier.net forum for various suppliers.) The low boot was introduced mid-war, as a leather-saving initiative, and was seen either black or brown. The brown boot was usually as a result of the raw tan leather being treated with Lederfett (dubbin) or even axle grease, for waterproofing. (Using brown boot polish does not produce the same effect.) There were two models of low boot: the M37 Schnürrshue, which was issued pre and early war in addition to Marschstiefel, and was slightly taller than the later M44 version. Again, Epic Militaria, Richard Underwood and Militaria-net are all good sources for low boots.Gamaschen
These are the green gaiters worn above low boots, which can be sourced from various places. The picture shows a comparison of post-war gaiters (above) with reproduction WWII gaiters. The post war ones are made of different material, and are a slightly different shape. For just a few pounds more, it is well worth getting good reproductions – Richard Underwood’s are best. He also does the first model gaiters, which have a thin strip of leather on the lower edge. Either black or tan leatherwear is correct.Jump to top of page
Jump to start of Part 1: Feldgrau uniform
Jump to start of Part 2: Headwear, leatherwear, footwear
Jump to start of Part 4: Lightweight uniforms and shirts
Part 3: Field kit and weapons
The basics
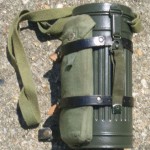
So, assuming you have your belt, you now need some things to put on it. Firstly, you will need the correct mag pouches for the weapon you are using. Next, the breadbag. This is worn over the right buttock, with the left strap just to the left of the Y-strap at the back. You can use this to store airsoft-related stuff, or food or water, etc. The crucial thing is to put something in it. Nothing looks more naff than a completely flat breadbag. If you can’t think of anything that needs to be in it, stuff some socks or gloves inside. Attached to the right side of breadbag should be the water bottle. Reproduction water bottles have recently become available, and they look nice and accurate. If you want an original one, try eBay. The final essential piece of kit (although I think it’s all essential!) is the gasmask tin. It is such an iconic item, and is useful for carrying all sorts of stuff. There are repro ones available, but compared to originals, they seem a bit flimsy, and not quite the right shape. For just a few pounds more, I would recommend getting an original. All field kit is usually available from Richard Underwood.You expect me to carry all that?!
As the months went on, I started buying (and wearing) more and more field kit. Yes, most of it is not necessarily practical, but it is what the soldiers wore. Contrary to the Brits, who tended to dump what kit they felt was an unwanted burden, most pictures will show the Germans with full field kit, even whilst in combat. So, here is what I wear in addition to the above:
Mess tins – these can be strapped to the left side of the breadbag, or to an A-Frame.
Gasplane pouch – up until ’41 or ’42, rubberised ones, worn on the gasmask tin strap across the chest. After that, cloth ones were issued, and attached to the tin itself, with leather equipment straps. You can actually buy post-war Bundeswehr gasplanes on ebay, for just a few quid – the perfect pouch filler. Bayonet, scabbard and Field spade – yes, now it’s getting silly! But basically, the more kit you have, the more authentic you look. If a 40-something bloke with a dodgy back can wear this lot, then there’s no reason why most of you can’t, too!Zeltbahn – a great piece of kit, first issued in 1934, the Zeltbahn is a large triangle of Splittertarn material, fitted with various buttons and grommets. It can be worn as a personal rain cape, or buttoned together in multiples of 4, it can be made into a tent. See www.zeltbahn.com for all the various uses.
A-Frame – a leather and canvas frame that hooks onto the Y-straps, upon which you can strap some of the above field kit, like mess tins, Zeltbahn, blanket, etc. Available from about 1941 onwards, it is a classic look of many troops at Stalingrad.
Rucksack – from 1944, some Heer troops were issued with a rucksack, which hooked onto the Y-straps. The A-Frame and its load could also be hooked onto the back of the rucksack.
Finally, here is a good site that shows how the belt kit can be put together, and various A-frame configurations: www.mp44.nl
Something to shoot the enemy with
In all this talk about WWII kit, you’d be forgiven if you thought I’d lost sight of the airsoft side of things Obviously, your weapon will be one of the most expensive items you need, so it’s important to think about what you’re going to buy. There are a lot more weapons available now, but there are still gaps in the market.Bolt action
In 1939, the typical Heer rifle squad would have one MG34 and the rest of the men armed with Kar98k rifles. Heh, so here we start to encounter difficulties, since nobody (yet) makes an MG34 (or MG42), and a decent K98 is not the cheapest of weapons. Your options are: D-Boys K98 – don’t go there! A completely impractical shell-ejecting gun that is hopelessly underpowered and inaccurate – you’d be better off with a drinking straw and a bag of BBs. However, they do have their uses, as cheap externals in which can be fitted decent internals from a springer, such as a JG BAR10 – if you’re good with your hands. Quite a few people have done this, and there is a very comprehensive thread on it here: www.ww2airsoft.org.uk forum. The other K98 available is the gas-powered Tanaka, which is a beautiful and high-quality gas-powered weapon; but it’s not cheap.
Sub-machine guns
From 1940 onwards, the MP40 started to become available, and was issued to NCO squad leaders. The AGM airsoft MP40 is an excellent, rugged and affordable SMG. For a short-barrelled weapon, it is quite accurate, and is good to go straight out of the box. The standard magazines hold 50 BBs, which I find quite adequate, providing you have half a dozen of them. Kings Arms also make a 150-round mid-cap, which I personally do not like, because some people have difficulty getting them to fit easily into the gun. The AGM MP44 – ok, so technically it wasn’t an SMG, I know – is also a very good weapon, more accurate and with slightly better range than most MP40s. The only downside is that you can only get hi-caps for it, so lots of rattling about and winding required. Both the above weapons are made in China, and so supply of them can be hit and miss, and clones are frequently released by other Chinese companies which spring up.
Pistols
You can get Lugers, Walther P38s and now Browning HP pistols. I am not much of a pistol fan, since I find the difficulties of keeping gas mags leak-free to be a constant pain in the posterior. However, for some events, organisers may stipulate that those with bolt-action rifles running between 351-500fps must also have a sidearm for engagements at less than 20 metres.
With most WWII airsoft events having ammo limits (some of them quite stringent), the overriding power of the SMG over the single-shot rifle is diminished somewhat. I’d recommend the MP40 as a good starter weapon, and the K98 as the most authentic. I’m not up-to-date with the latest weapon suppliers (Google is your friend), but often guns can be purchased cheaper overseas – but be careful to factor in postage and possible customs charges. As mentioned previously, you might want to get high-value purchases like a weapon from the UK, in case of any issues. As with any other airsoft weapon purchases, you will need to supply the seller with your UKARA or AFRA number.
Jump to top of page
Jump to start of Part 1: Feldgrau uniform
Jump to start of Part 2: Headwear, leatherwear, footwear
Jump to start of Part 3: Field kit and weapons
Part 4: Lightweight uniforms and shirts
If you really can’t wear the wool Feldgrau uniform (or if you just can’t stop spending money) then the German lightweight uniform is an ideal purchase.
The development and use of the German lightweight / summer uniform – made of cotton herringbone twill (HBT), and hereafter referred to as Drillich – was remarkably similar to the way the British “denims” were used. It was a case of the cotton work clothes – used for messy, menial tasks – being found to be cool, practical and comfortable for warm climes. Eventually, in both the British and German armies, these became acceptable as summer uniforms.
Work clothes
The first German Drillich items were issued from 1933-1942, and were off-white in colour. The tunic had five buttons, no loops for shoulderboards, and just two lower pockets, without any flaps. In early 1940, the same pattern tunic was produced in a reed green colour, which was far more practical. Eventually, troops started to sew on the chest eagle and collar tabs, as found on the traditional wool tunic. The lightweight uniform was proving to be very practical in the summer, and gradually became “official” wear. To my knowledge, the only producer of the repro reed green work tunic is Panther Store – www.panther-store.cz
Incidentally, there was also a lightweight uniform similar to the M36 wool tunic, made of canvas rather than cotton, pale blue-green in colour, with a bottle green collar. This was much less common than the reed green Drillich uniform, and was not officially issued to front line troops. (Spearhead Militaria on ebay sell a version of this uniform, along with an M40 version and the off-white tunic mentioned above, but featuring four pleated pockets. It is questionable whether the latter two ever existed.)
A “proper” uniform
From 1940 onwards, the  issued were identical in cut and style to the corresponding wool tunics, except that all had six buttons. Now including shoulderboard loops, the M40 had pleated pockets, the M42 had flat pockets, but still with the scalloped flaps, the M43 had flat pockets with straight flaps. The Heer versions of all of these tunics had the series of three holes for belt hooks, but instead of four sets (two front, two back), they just had two sets of holes, one each side of the tunic. Inside, there was no provision for the internal suspenders; just the short tabs attached, like the M42 and later wool tunics. Insignia – chest eagle and collar tabs – was predominantly BeVo, but with traditional wool shoulderboards – shoulderboards made from Drillich material never existed. Incidentally, NCOs’ collar tresse was often not sewn onto the Drillich tunic, their rank signified only by their shoulderboards. Some vendors sell Drillich uniforms with distinct white stitching on them. I am unsure how common these were, since they do not appear in the books that I own.
“Deutches Afrika Korps” uniform
The other lightweight uniform issued was olive green in colour, and principally worn by the Afrika Korps – contrary to popular opinion, it was not sand-coloured – although after a few months in the scorching sun of north Africa, it would be bleached of much of its original colour. This uniform was also issued in temperate climes such as Italy and the south of France, and there were two main variants. The first was similar to the M40 tunic, but had six buttons instead of five, and the second model was similar to the M42. The DAK tunic was usually worn with the top button undone and the lapels folded back.
Recommended sellers for the various types of lightweight German uniforms would be www.militaria-net.co.uk, www.panther-store.cz www.richardaunderwood.com or www.epicmilitaria.com .
Shirts
 There are good reproduction shirts out there, but you can get away with most collarless shirts under your tunic. Early war, soldiers were issued with an off-white collarless shirt, which buttoned half way down the chest. Then came the mouse grey under-shirt, a soft collared shirt with two pockets on the chest – this was used throughout the war. In 1943, a pale green shirt was introduced, which featured shoulderboard loops and two pockets, all fitted with the standard tunic buttons. The shirt was sometimes worn without the tunic (although rarely in battle), and photos show them with shoulderboards, chest eagle and even medals affixed. Both shirts are usually available from Richard Underwood, Militaria-net or Epic Militaria.
You can choose whether to wear a shirt beneath the tunic or not, but my one piece of advice on this is do not ever wear a T-shirt. Even with the tunic buttoned to the top, T-shirts are often visible, and nothing spoils an otherwise good impression like seeing a modern T-shirt poking out. I have sometimes worn a Heer sports vest beneath the tunic, or if it’s really warm, nothing at all. Remember, if you are not wearing a collared shirt beneath the tunic, you should have the Kragenbinde (collar liner) fitted. Details like this are not expensive, but really enhance your impression.
Jump to top of page
Jump to start of Part 1: Feldgrau uniform
Jump to start of Part 2: Headwear, leatherwear, footwear
Jump to start of Part 3: Field kit and weapons
Jump to start of Part 4: Lightweight uniforms and shirts
[divider]

