

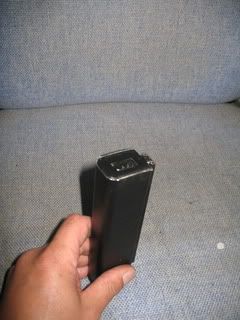
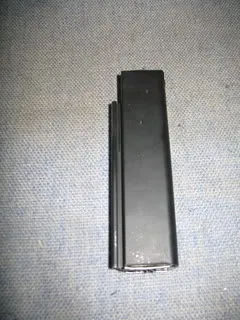
The desire to have '20rnd' length mags' in a Thompson, especially if you're doing a Brit impression, may have come across your mind - So for all of those that want to use 20rnd sized mags in their Thompson, but are put off by the price of the TM high-cap ones, the lack of cheaper AGM alternatives or the rules enforced by WW2 themed games (e.g: GMA's ban on all hi-cap/rattling mags); then this might be up your street! They hold a usable 40 BBs (41/42 in total) only 7 less than the advertised capacity of the '30rnd' mag's before conversion.
1. First, take a Cyma/Cybergun brand '30rnd' lo-cap (the type that comes with the gun). These mags' are identifiable by the three screws down one side and the lack of detail on the base of the mag'. Open the mag' by unscrewing the three screws and pulling apart the body halves (The internal spring may cause parts to fly out, BTW). Take out all of the internals and put them safely to one side.
2. Re-assemble the mag' body halves together minus the internals and mark them up with two lines (seen in the picture as edges of marking tape) - one just below the 15rnd marker dot/window and one just above the 25rnd marker dot/window. Cut the mag' into three sections; squarely along these lines:
http://h1.ripway.com/Mansunite/Pictures/01MarkUp.JPG
3. Once cut, check that the cut was square and true. Do this against known flat perpendicular surfaces for the top and bottom sections of cut mag'. Throw the middle section in the bin:
http://h1.ripway.com/Mansunite/Pictures/02Cut.JPG
4. Using a known flat surfaces, sand the newly cut edges of the top and bottom pieces of mag' to ensure a flat edge (especially if the cutting wasn't precise enough), and to reduce the cut edge down to the level of half-way through the marker dot/window nearest to the cut on the sides of both top and bottom sections of the mag:
http://h1.ripway.com/Mansunite/Pictures/03Sand.JPG
5. Once both cut edges are sanded down to this level, the top and bottom section of mag' should mate nicely with each other. Note: The two halved marker dots/windows now match up to produce a singular whole marker dot/window, which is the new 15rnd marker dot/window on the '20rnd' mag' - if they do not, and instead look a bit like a figure-of-8 or an oval, then sand down the edges some more. Using the position of the marker dot/window this way helped me guarantee the length of the converted mags' produced were correct and all would be the same length. Disassemble the mag' body halves again and glue the relative top and bottom sections of each half together with a smear of superglue:
http://h1.ripway.com/Mansunite/Pictures/04Glue.JPG
6. Once the superglue has dried on both newly made '20rnd' mag' body halves re-enforce the joint internally with some glued in strips of Plasticard or PVC sheet and as much epoxy as you desire. Just don't put any glue in the 'U' shaped BB channel! I re-enforced mine with plastic strips and epoxy in the base of the metal weight recess (leaving space still for the inclusion of a weight to be fitted) and inside the mag's insertion guide/rail.
7. With the top and bottom sections now glued and dried, sand down each body half and fill with epoxy putty to hide the join. Keep fitting the two body halves back together every now and then (as shown in the picture) to ensure the two halves haven't warped to miss aligned during the glueing/sanding/filling. Sand down the epoxy filler putty when dry to a smooth flat level:
http://h1.ripway.com/Mansunite/Pictures/05Fill.JPG
8. Lightly sand the whole mag' body to prepare it for a bit of paint. Mask the top end and feed hole with some masking tape and block up the screw holes on the side with a bit of bluetac or similar:
http://h1.ripway.com/Mansunite/Pictures/06Prepare.JPG
http://h1.ripway.com/Mansunite/Pictures/07Prepare.JPG
9. Paint the entire mag' in a series of light coats. I used a cheap but hard-wearing can of black automotive spray paint bought from a £1 store. It's not quite matt and it's not quite gloss, and so looks really rather good and looks more realistic than just the bare Cyma plastic.
http://h1.ripway.com/Mansunite/Pictures/08Paint.JPG
http://h1.ripway.com/Mansunite/Pictures/09Paint.JPG
10. Once the halves are fully painted and dry, reassemble the whole mag' with it's internals. When reassembling, you've got to cut 10cm off of the internal spring for it to fit and operate nicely and make sure the U-shaped BB channel on both halves is smooth and clean. You'll only be able to fit one of the metal weights back inside the mag', due to the reduction of the mags' length, so add a little silicone adhesive or foam packing to either end to stop it sliding about in it's now oversized recess if it is a loose fit - but most sit tightly enough to not need this.
Further alterations to consider could be:
(a) Cutting the internal spring guide down a bit now that the spring has been shortened - perhaps manage an extra 5 BBs worth of capacity per mag'?
(b) Reassemble the mag with it's internals before filling, sanding and painting. Thus allowing you to eliminate all joining seams and fill up any screw heads showing.
A Proud Member Of 'Team Spleen!' who play mainly at Gunman Airsoft, Tuddenham, Suffolk.


I like the way your thinking! My 190 Rd hi caps rattled like hell yesterday at Die Glock, especially as I was only able to half fill one of them but they are all I have.


Excellenty-written guide, McV.  How long did it take you to do the work?


You've got nothing to ein, zwei, drei, vier
EDIT: Just so people know, these are the mags' I use in the conversion - available from RSOV.com quite cheaply for 2: http://rsov.com/index.php?target=products&product_id=1682
Excellenty-written guide, McV.
Thanks ![]() Glad it's useful/of interest.
Glad it's useful/of interest.
With all of the parts handy, the entire work only takes about 30mins per mag; a couple on mins' to cut the mags' (I recommend using a hand-power mitre saw), about 5mins to prepare, line-up and stick the halves together, and the rest of the time sanding the cut edges down to the correct height and 'flatness'. The real time-ache, is the waiting for superglue to dry, epoxy glue to dry, epoxy filler to dry and paint to dry! With that included, it takes about 2-3hours to get to the final coat of paint and then they can be left overnight for the paint to harden-up. Ideally, which I've now started doing, is cutting all my mags' in a batch, sanding them all down together, gluing and epoxying them all at the same time, etc... Saves on time, mess and equipment/tool usage and storage
A Proud Member Of 'Team Spleen!' who play mainly at Gunman Airsoft, Tuddenham, Suffolk.
If you were to use the hi cap mag, all you would have to do is strip it down and realise that there is a large area below the mechanism. You could shave that down, put back on the floor plate and voila. Hope this helped
GUNS: (ww2)
AGM sten mkII
Classic Army Colt 1911A1 GBB pistol
ARES PPSh-41
Deact Mosin M38
If you were to use the hi cap mag, all you would have to do is strip it down and realise that there is a large area below the mechanism. You could shave that down, put back on the floor plate and voila. Hope this helped
Short hi-caps are readily available already. There's no need to make any.
do you a link to any shortcaps??
do you a link to any shortcaps??
Google m1a1 hicap 190
A few samples:
http://www.airsoftsupplydrop.co.uk/stor ... azine.html
http://www.wolfarmouries.co.uk/airsoft/ ... 3SMTM1A190
http://www.specialairsoftsupplies.co.uk ... oductId=64
If you were to use the hi cap mag, all you would have to do is strip it down and realise that there is a large area below the mechanism. You could shave that down, put back on the floor plate and voila. Hope this helped
Short hi-caps are readily available already. There's no need to make any.
Yes, as No1-Sonuk has said, this conversion guide given to make 20rnd length Thomson mags' which arn't hi-caps, and quite a few WW2 airsoft events don't like the use of hi-caps (and the rattle annoys a lot of players too!).
EDITED: for spelling's sake.
A Proud Member Of 'Team Spleen!' who play mainly at Gunman Airsoft, Tuddenham, Suffolk.
do you a link to any shortcaps??
Google m1a1 hicap 190
A few samples:
http://www.airsoftsupplydrop.co.uk/stor ... azine.html
http://www.wolfarmouries.co.uk/airsoft/ ... 3SMTM1A190
http://www.specialairsoftsupplies.co.uk ... oductId=64
cheers

This guide is great and I am going to convert my 3 lo caps, however I do have 2 'long' hi caps I would like to convert as well. I know that 190 round hi caps are available but I don't really want to buy any more magazines. Has anybody done a conversion on a 'long' hi cap that they would be willing to share?
Thanks
'shokt


"The older I grow the more I distrust the familiar doctrine that age brings wisdom"
H.L.Mencken
TBH, you'd probably be better off selling the long ones and buying short. Much less hassle unless you're good with sheet metal work...
Thought I'd give it a go anyway, quite simple in the end.
Push out the two pins and remove the base plate and the plastic bit inside is actually in 3 bits. Unscrew the middle portion of the innards and then connect the top to the bottom, presto, innards are now 20 round length.
The fussy bit was cutting and bending the metal mag outer but all in all took 30 mins and I am quite pleased with mesself 
I now have 3x 20 round size low cap mags and 2 x20 round size mid cap (190 round ) mags
'shokt
"The older I grow the more I distrust the familiar doctrine that age brings wisdom"
H.L.Mencken
wonder if it would work with hi-caps?? can use em in my original 5 mag holder then ![]()
wonder if it would work with hi-caps?? can use em in my original 5 mag holder then
That's what he's done. He shortened a 400-round hi-cap into a 190.
Rammix,
The pictures are of a 400 round hi cap cut down to resemble a 20 round (190 round hi cap) magazine. They now fit in the 5 cell 20 round mag pouch I have.
'shokt
"The older I grow the more I distrust the familiar doctrine that age brings wisdom"
H.L.Mencken
ah, rite, might leave the 3 I have as they are then, handy size to keep up with the spray an pray lot at our site ![]()
have 5 long lo-caps I might have a go at instead ![]()
They're on ehobbyasia now
GUNS: (ww2)
AGM sten mkII
Classic Army Colt 1911A1 GBB pistol
ARES PPSh-41
Deact Mosin M38

this might be a "derp" question! but the piccies of ur fantastic assembly guide dont seem to work for me...do i need to be a member of the site u have linked them on? 
real keen to try this out especially cuz the 30 round mags are a bit too tight in me bren pouches.. thanks for posting mc vick ![]()
Kiwi airsofter, just pew-pewing.
this might be a "derp" question! but the piccies of ur fantastic assembly guide dont seem to work for me...do i need to be a member of the site u have linked them on?
real keen to try this out especially cuz the 30 round mags are a bit too tight in me bren pouches.. thanks for posting mc vick
No, not a 'derp' question at all.
Unfortunatly, the sever I hosted those pictures on up went 'belly-up' without any warning. I'll see if I can hunt down the original photos for you.
A Proud Member Of 'Team Spleen!' who play mainly at Gunman Airsoft, Tuddenham, Suffolk.