

Hi guys & girls,
For those who have the Dboys Mauser and want to have a go at modifying it I have written a guide with pictures.
Guide to stripping the Dboys Mauser 98k air soft rifle.
Step one
Remove the bolt from the action..
Step 2
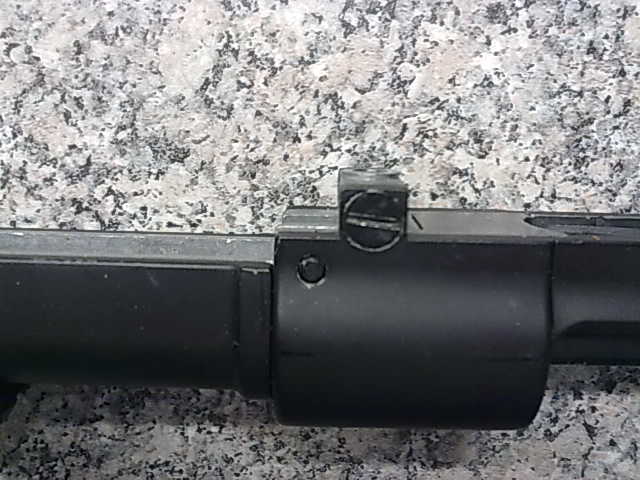
Lift up rear sight and remove hop adjusting screw.
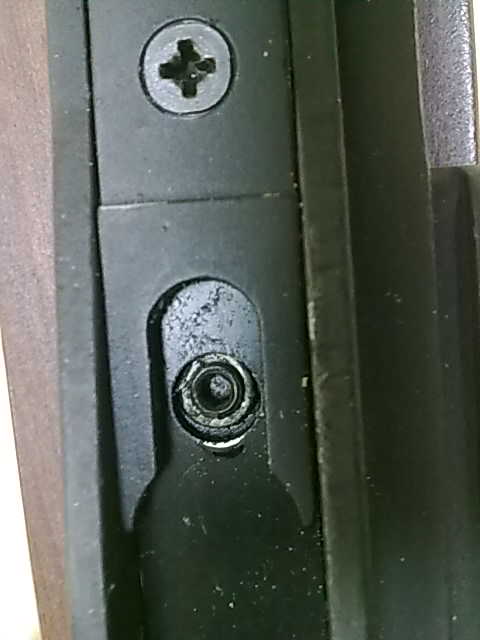
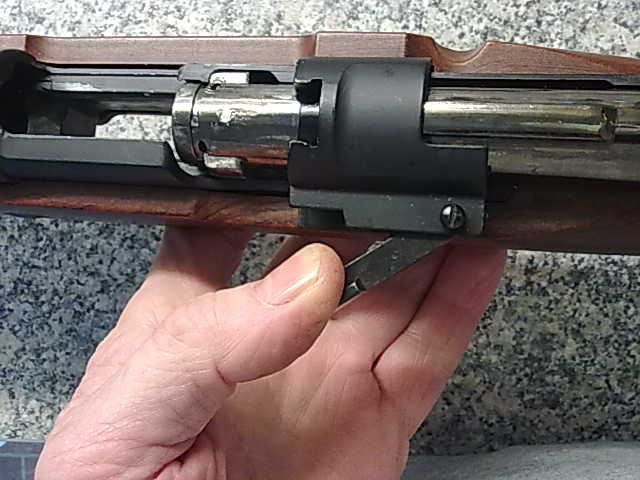
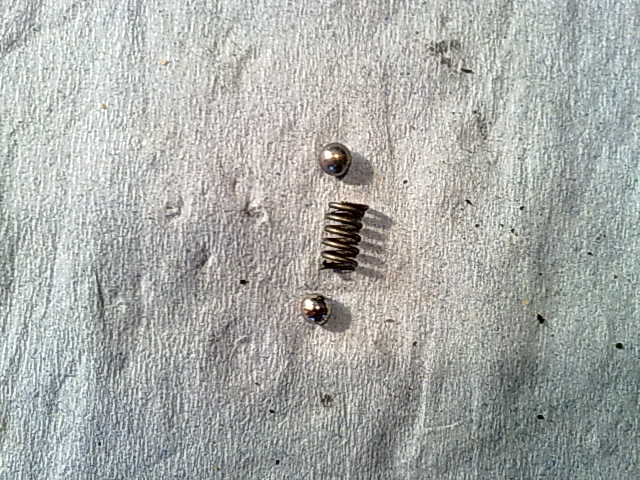
Step 3.
Under this grub screw will be a ball bearing then a spring then another ball bearing. Remove these with a magnet, don’t lose them as they are your hop adjusters.
Step 4.
Slide the front barrel band forward off the woodwork by depressing this sprung strip of plastic ( steel on the real rifle).
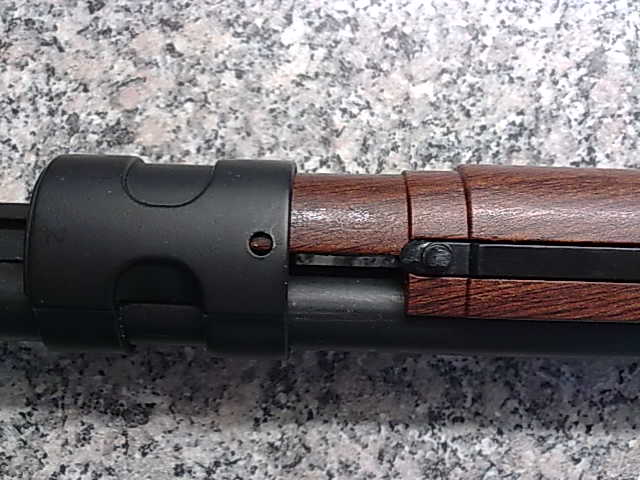
Step 5
Remove the spring bar and put it to one side.
Now slide the rear barrel band / sling mount forward to release the upper wooden hand guard.
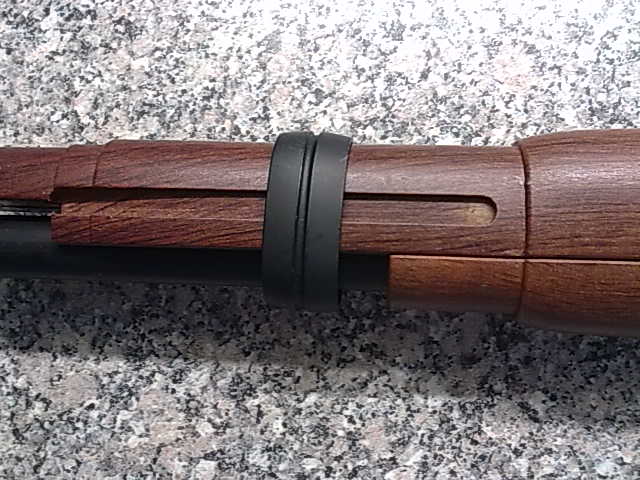
Step 6.
Remove upper hand guard.
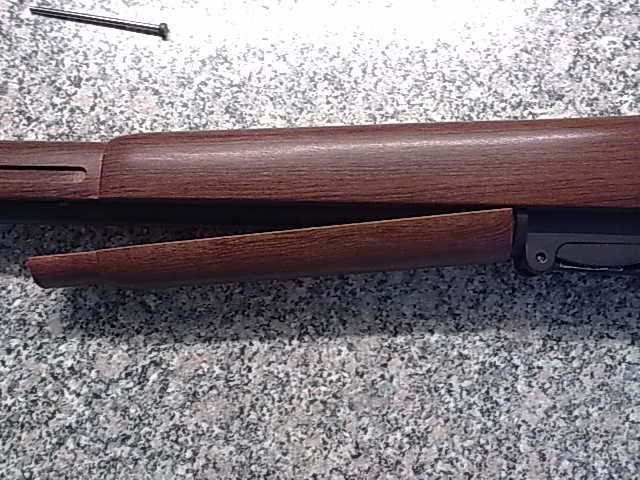
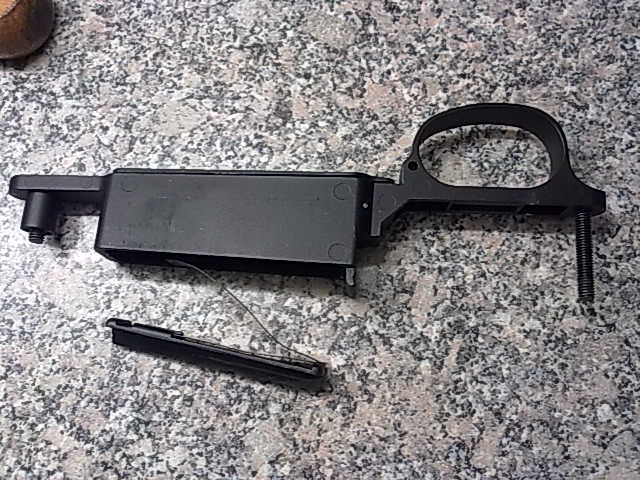
Step 7.
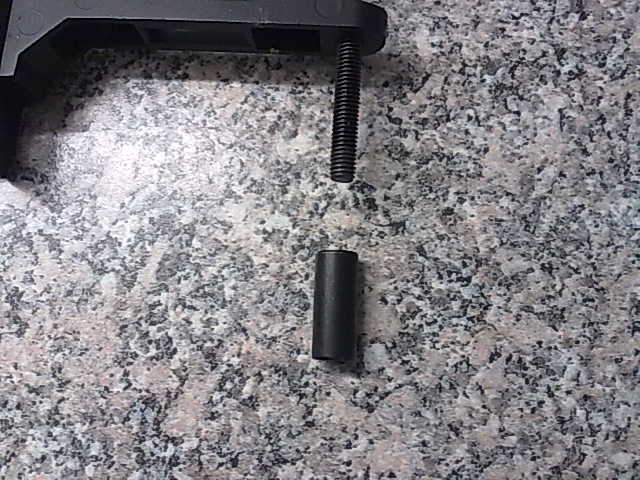
Turn rifle over and remove the 2 large slotted screws that secure the mag. Well/ trigger guard to the stock and action. The rearmost screw is just out of shot to rear of trigger guard. Please note the rearmost screw is longer and has a tubular spacer fitted. This spacer may stay in the stock. Make sure you don’t loose it.
Step 8.
Lift off the mag.well/trigger guard unit together with the screws and spacer.
Step 9.
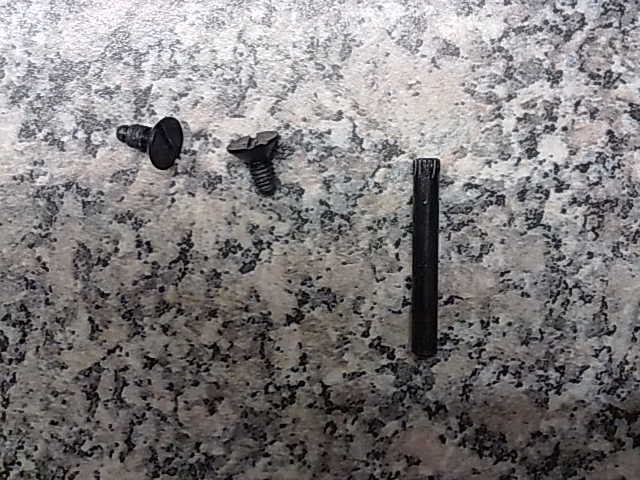
Lift the stock off the action and separate the pair. Put stock to one side. You now have the outer barrel and action unit. Next remove the two screws ( one each side) and the pin holding the rear bolt housing section to the barrel section. NOTE. The pin has a milled section at one end to grip the hole it’s in. The pin will only drift out one way, so if it appears too tight try drifting from the other side. Separate the bolt housing and put to one side.
Step 10.
You now need to remove the section that has the rear sight on it. This section of the barrel houses the hop unit. You will see 2 pins ,drift these out ( one end of each pin is milled like before, so only drift one way.).
Step 11.
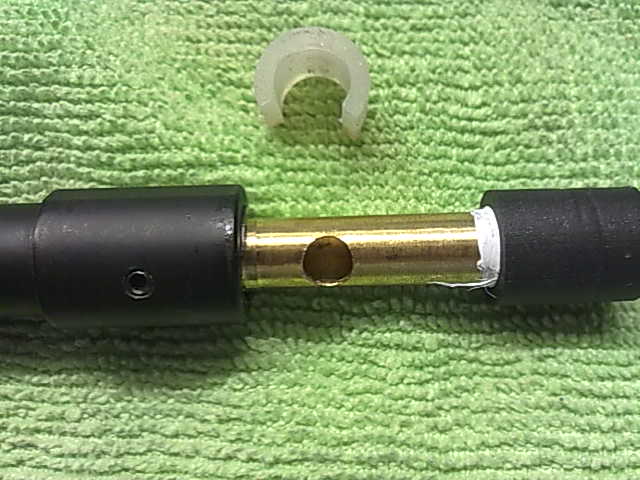
You are now looking at the outer barrel with the inner barrel still fixed in place The inner is held in place by two small grub screws, one near the muzzle and one near the breech. You only need to remove these if you are replacing the inner two piece barrel,(highly recommended).
Next , pull down the oblong plastic block from the hop section of inner barrel. Try to keep it in correct orientation to aid re-fitting as it only goes back one way.
Please note. I did this strip down some time after modifying mine ,so the white p.t.f.e. tape you see here will not be present on your rifle. We will be re-taping this prior to re-assembly.
What you now see is the breech seal, ( on the right, where the normal hop rubber would be on an a.e.g),
And to the left of that the hop rubber with nubbin ( one piece). Here they are already taped up with p.t.f.e.)
Below is the hop rubber and breech seal with tape removed. What you can’t see is the hop nub which is just a circular dimple on the underside of the saddle shaped hop rubber ,in the top part of the picture. This dimple must fit into the hole in the barrel. I re-shaped the dimple on mine into a concave dimple to replicate a `h` nub, This significantly improves accuracy and shot to shot consistency. Don’t attempt this if you haven’t got a steady hand as a Dremmel can kill your hop if you slip.!.
Step 12.
Now wind pt.f.e. tape around the re-fitted hop rubber and breech seal. Only one or two wraps at most otherwise it won’t go back together.
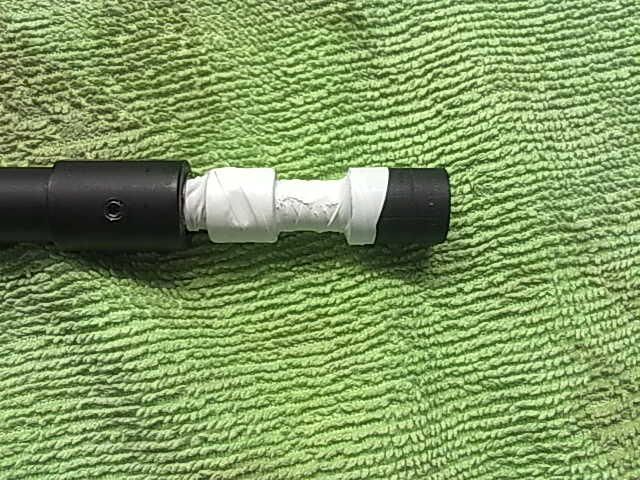
Step 13.
Re-fit the plastic block
Then re-assemble the rifle in reverse order.
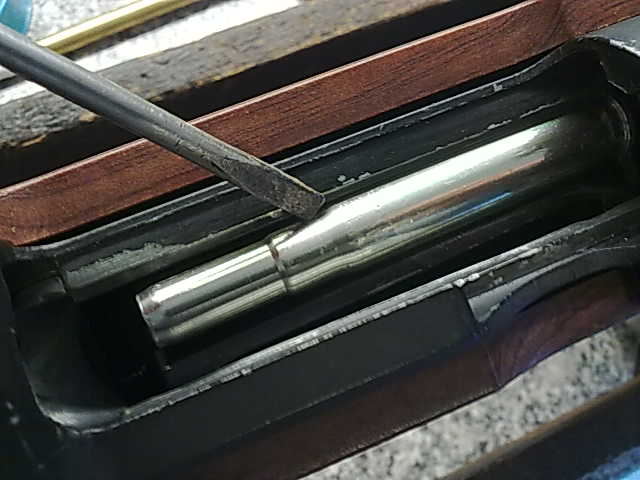
Remember, when fitting the section of outer barrel ( which houses the rear sight), this goes over the hop section and on its underside there is a small protrusion that locates with the outer barrel to keep the front sight aligned with the rear sight. ( hard to explain but you will see)...
It is on the extreme left of the pic below.
Because you have wrapped tape around the hop section you will have to squeeze the barrel and upper breech section tightly together in order to re-fit the two small pins that hold it all together.
Once re-assembled you may wish to modify the hop adjuster as I did. Instead of re-fitting the 2 ball bearings and spring you will need to replace the lower ball bearing ( the one that actually touches the hop nub) with something softer and flatter. The reason for this is that the b/bearing presses the nub in at the centre whereas the modified nub needs to be pressed down evenly across its width. I replaced the ball bearing with a piece of hard rubber that was shaped to fit into the hole in the outer barrel followed by a slightly stronger spring then the adjusting grub screw. I don’t know why Dboys use ball bearings as they are much too hard to be used against a soft hop rubber.
Please do not blame me if you damage any part of your rifle. If you are not confident in the workshop then get someone who is to use this guide for you.
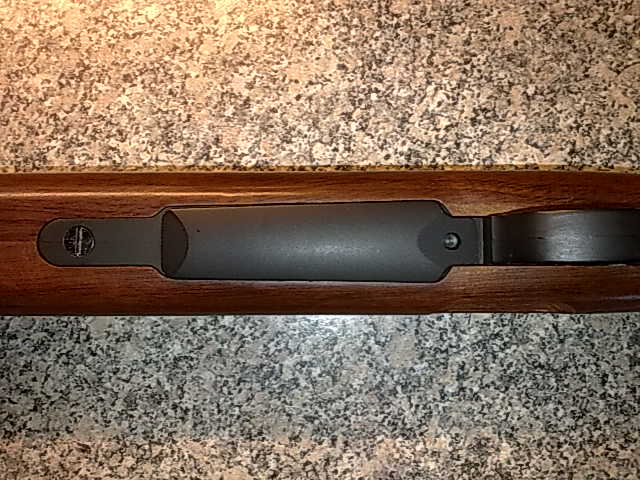
How to improve the loading of shells to prevent jamming.
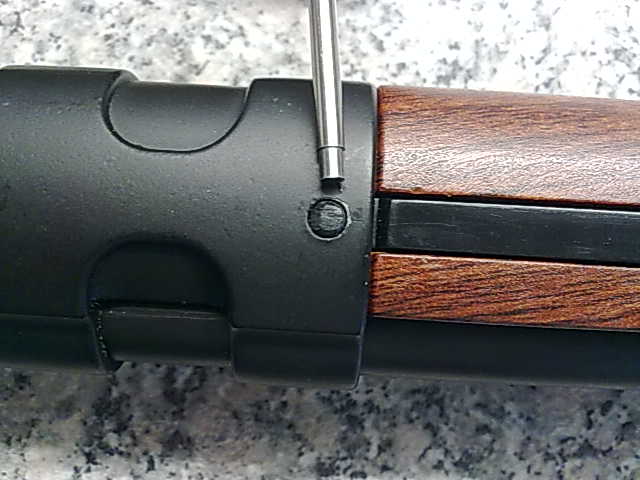
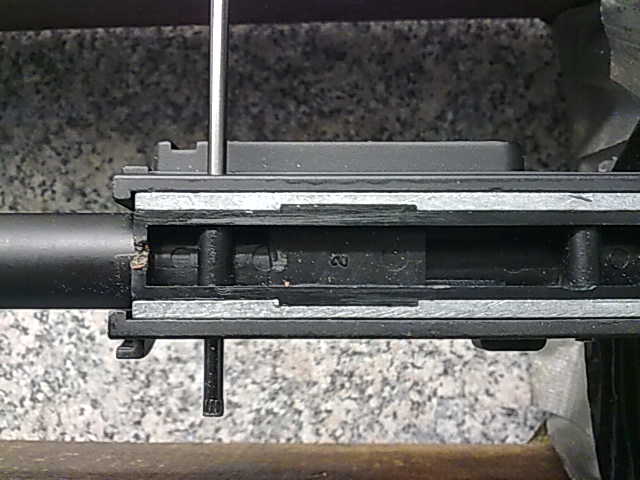
If you load all five shells in to your magazine the likelihood is that the uppermost shell will jam half in and half out of the breech. The reason for this is that the magazine well is a tad too shallow for all 5 shells. This can be cured by carefully chamfering the underside of the shell guide with a dremel or emery paper. . You only need to chamfer the first 1.5 - 2 inches on the right hand side ( that is measured from where the screwdriver is pointing to the front of the breech. See pic below.
Roughly from where the screwdriver is to the forward end of the shell. BUT on the underside of the bolt housing. Do this whilst you have the rifle disassembled as in my earlier work.
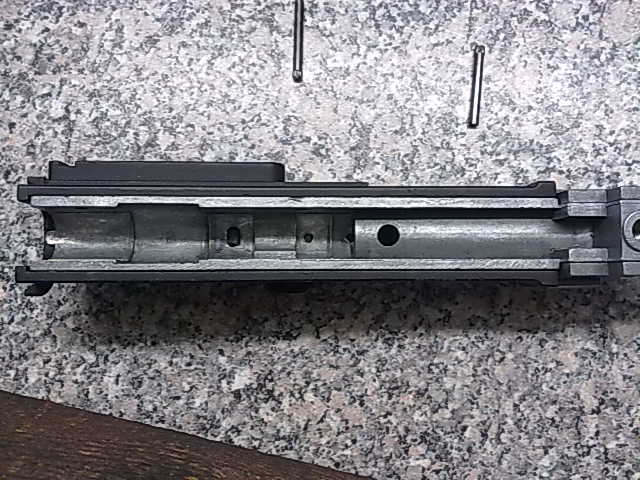
See second pic below.
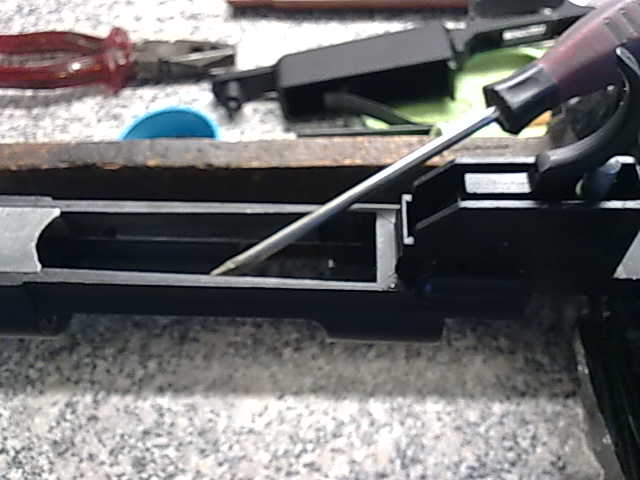
From screwdriver to breech, lightly chamfer off the sharp edge. This will improve feeding of shells no end. Since doing this I have not had a single jam.
END
"REMEMBER, LIFE IS NOT A REHEARSAL"

Great guide,

shame i chopped my dboys up, or id have had a bash at this
funny though, mine never jammed the 1st round , the only time it jammed was when shit blew back down the barrel and jammed the case in the breach.
"Take that you rotton helping of strawberry flan!"
Joseph Porta to "strawberrys and cream", in the sven hassel book ,ogpu prison
Superb! gonna save me a few head aches!
