

Evening everyone,
I'm just getting into WW2 airsoft thanks to Josh at Gunman. My team got into nam softing (thanks again to josh) last year and now we wanna go one step further back in time. Due to financial reasons we're going to do a french resistance load out. For the most part the weapons are easy to source, problem is our support gunner needs a gun so we've gotta build him one.
Now thing is it had to be one man portable. That wrote off anything on a tripod. It ended up as a toss up between a Bren or Lewis gun, as per the title you can guess which one I went for!
Now before I start I must point out that I lack any tooling more sophisticated than a dremel, power drill and hand tools. Also I'm trying to use as much found material as possible to keep cost down.
Righty, less talk more pics...
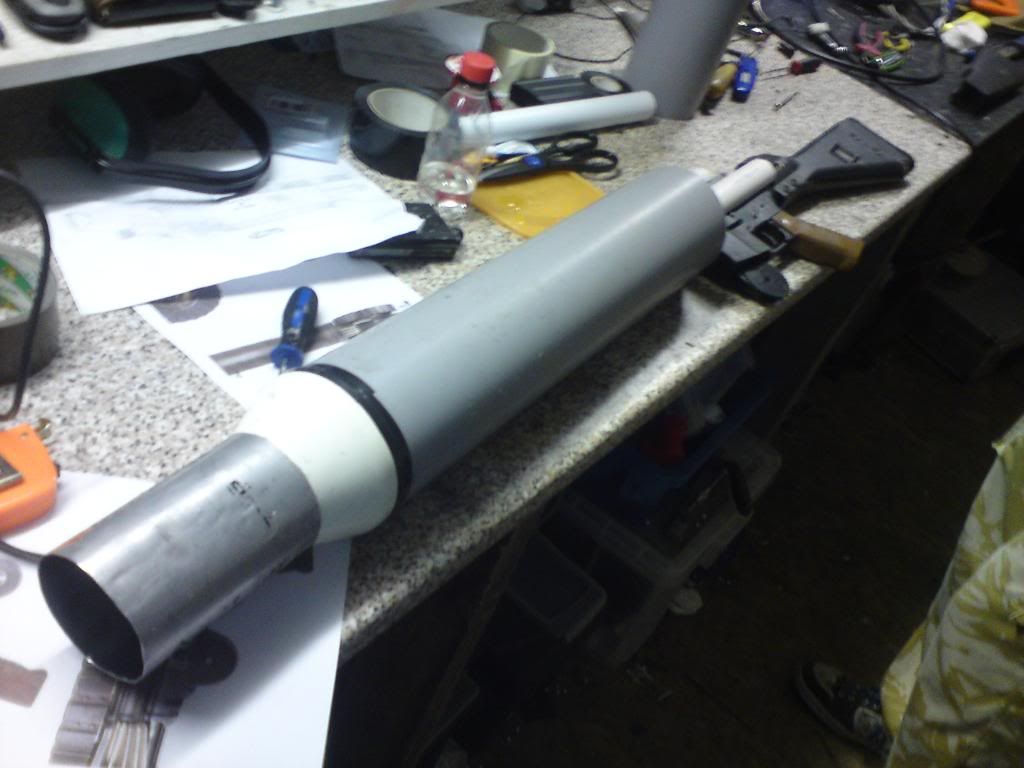
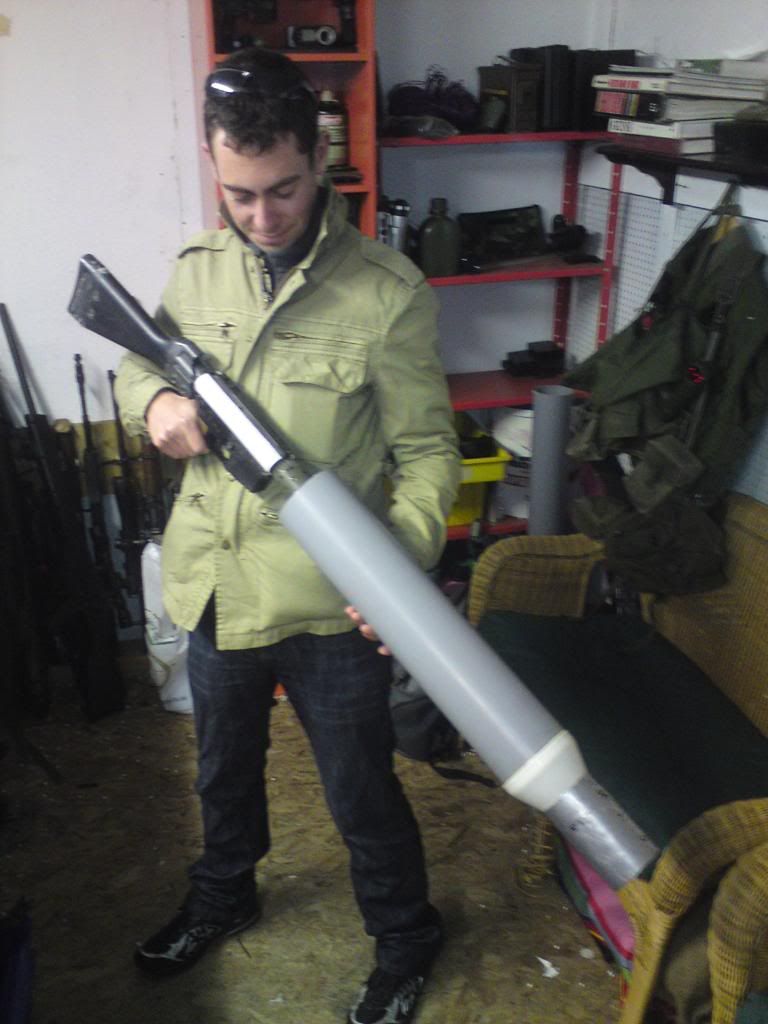
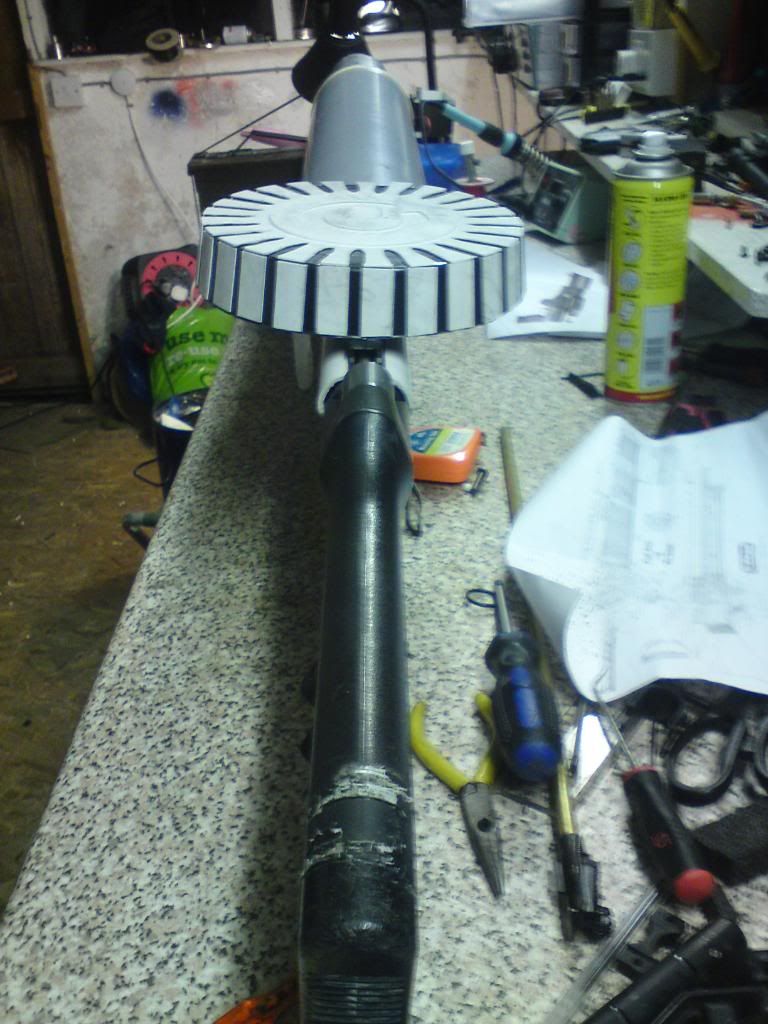
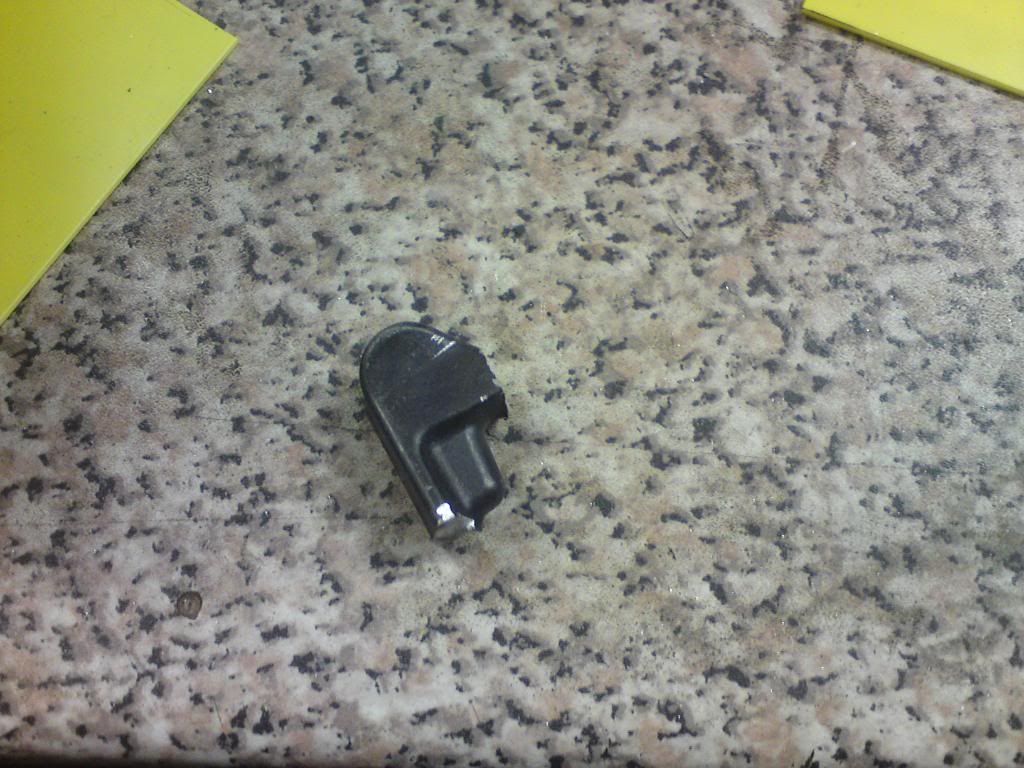
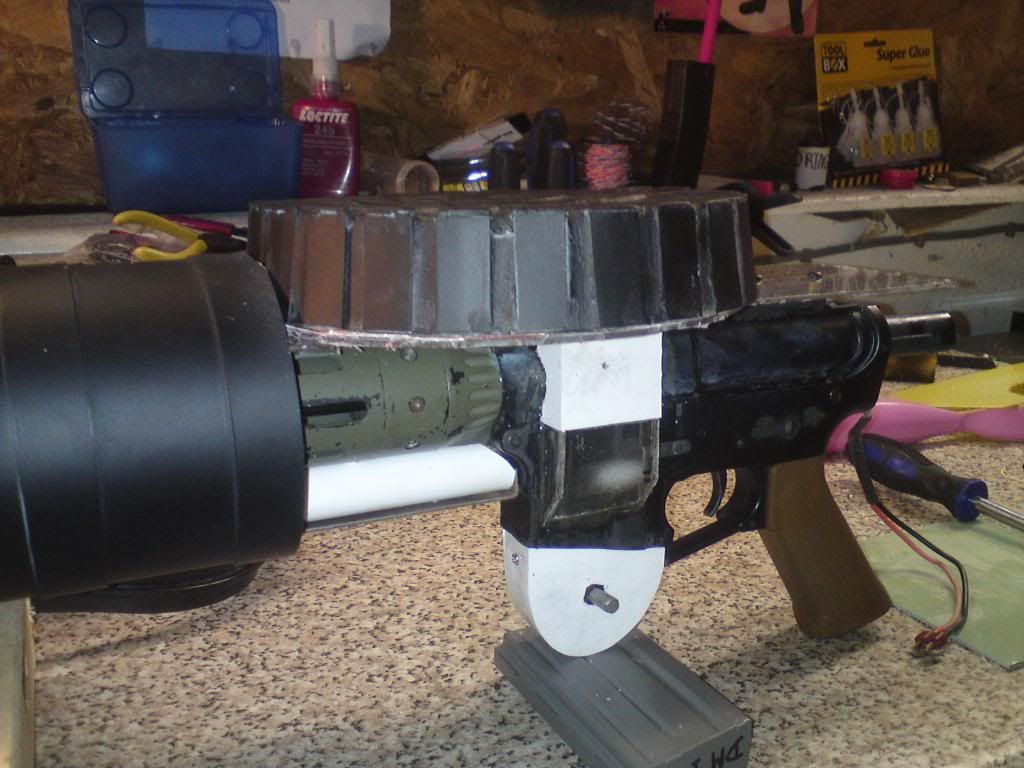
Front end
Slightly out of spec with regards width .5in wider and the angle of the taper is quite steep, but hey!
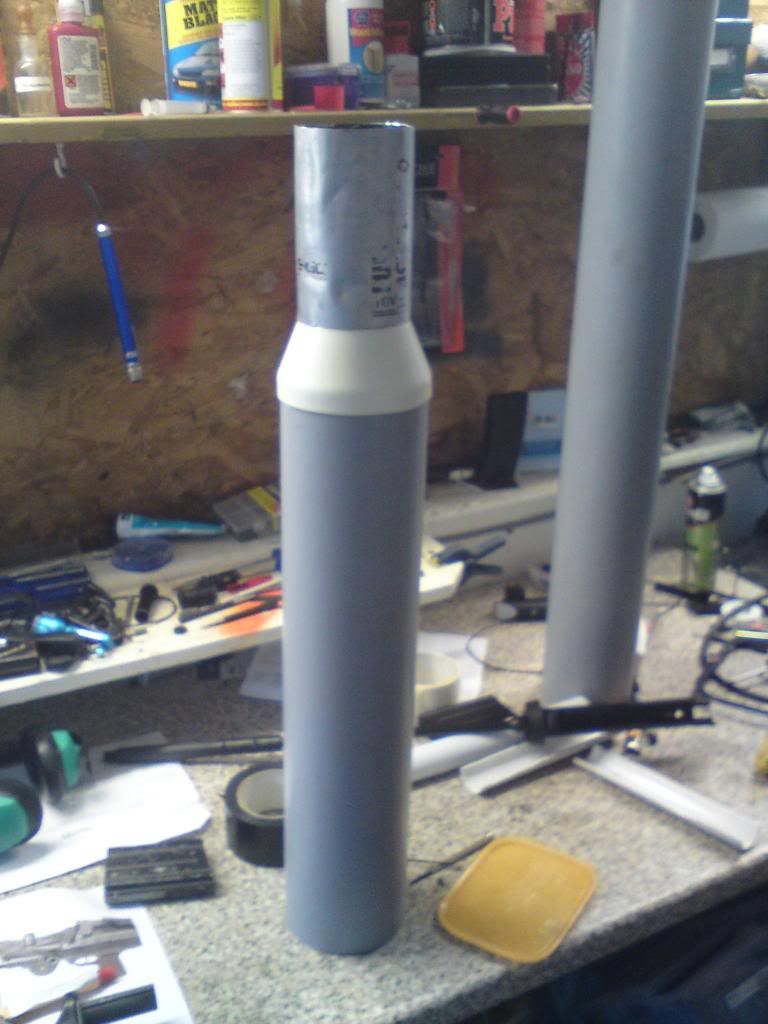
Made from and old SIG water bottle, desk lamp head and some waste pipe
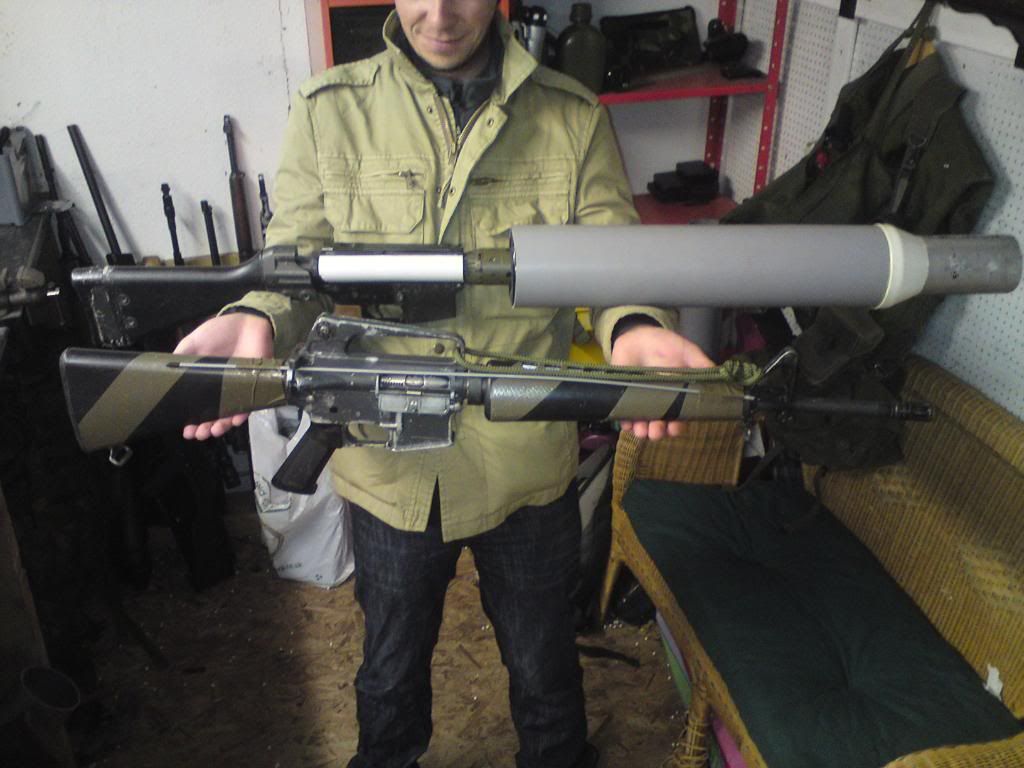
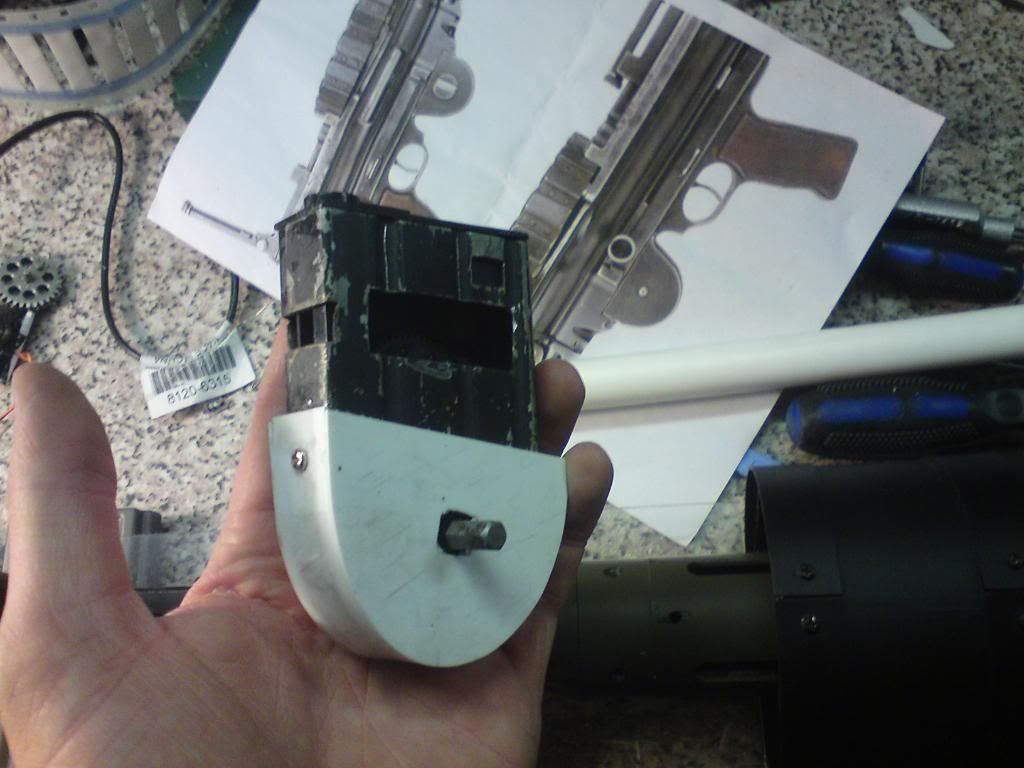
Receiver
Gone for an AR15 receiver as it's what I had. A g3 would look better but I didn't have one to hand and cost is an issue ![]() cut down VN high cap will provide ammo feed (more details later)
cut down VN high cap will provide ammo feed (more details later)
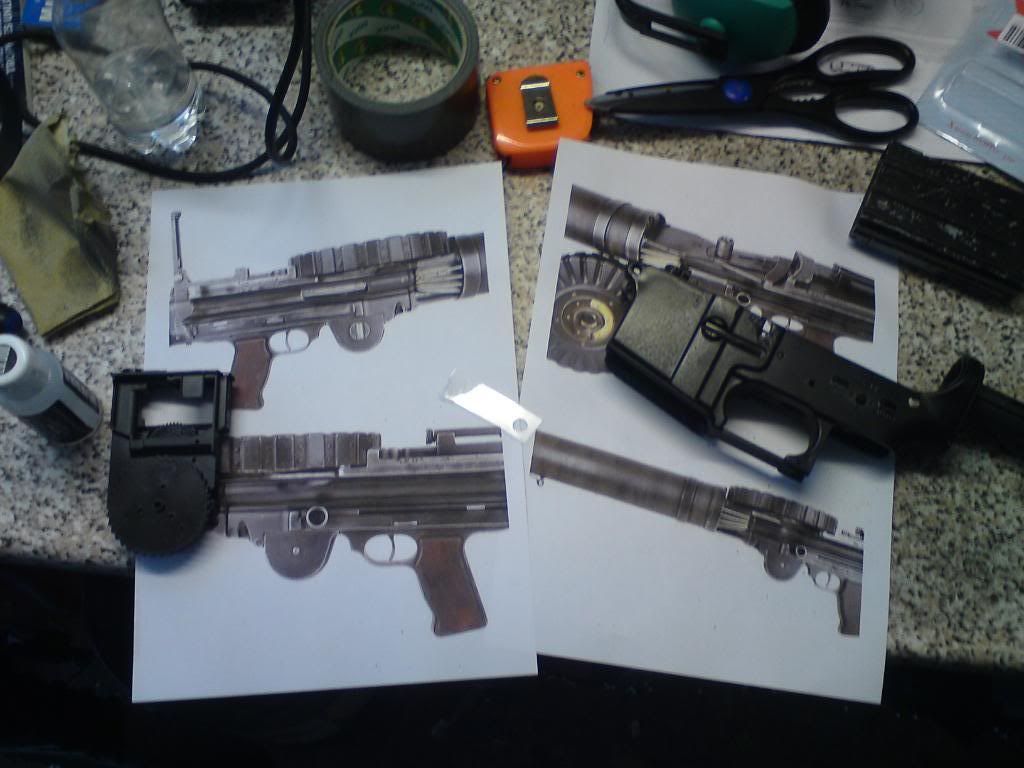

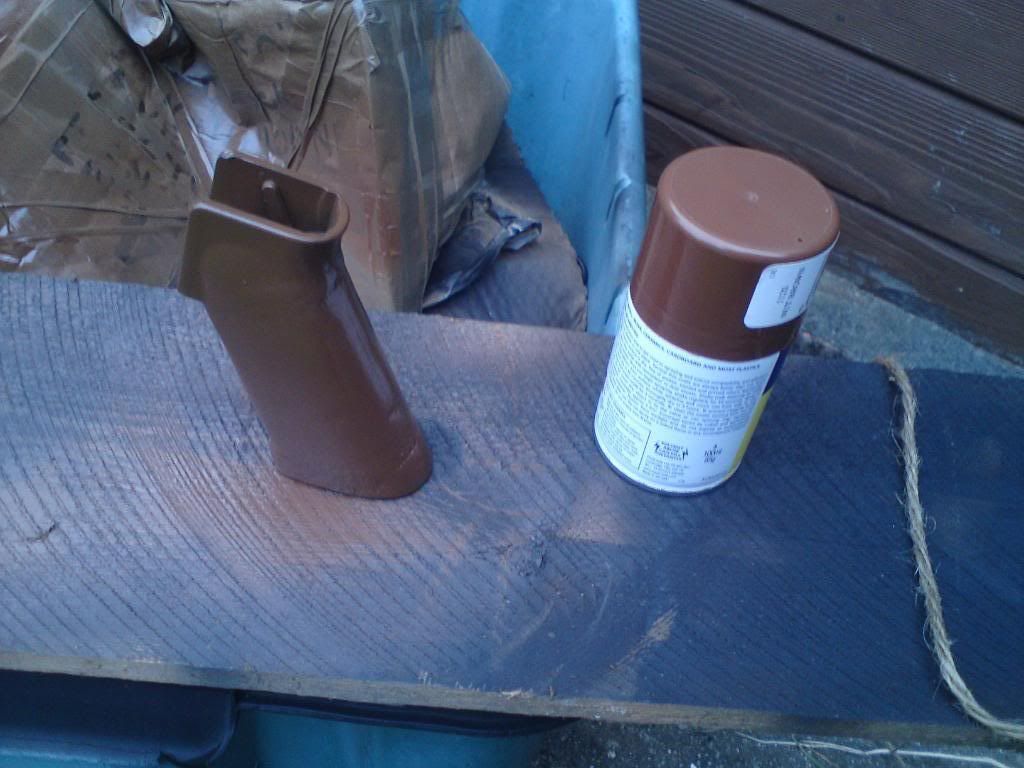
Pistol grip
Armalite grip sanded and spayed for the woodish look ![]()
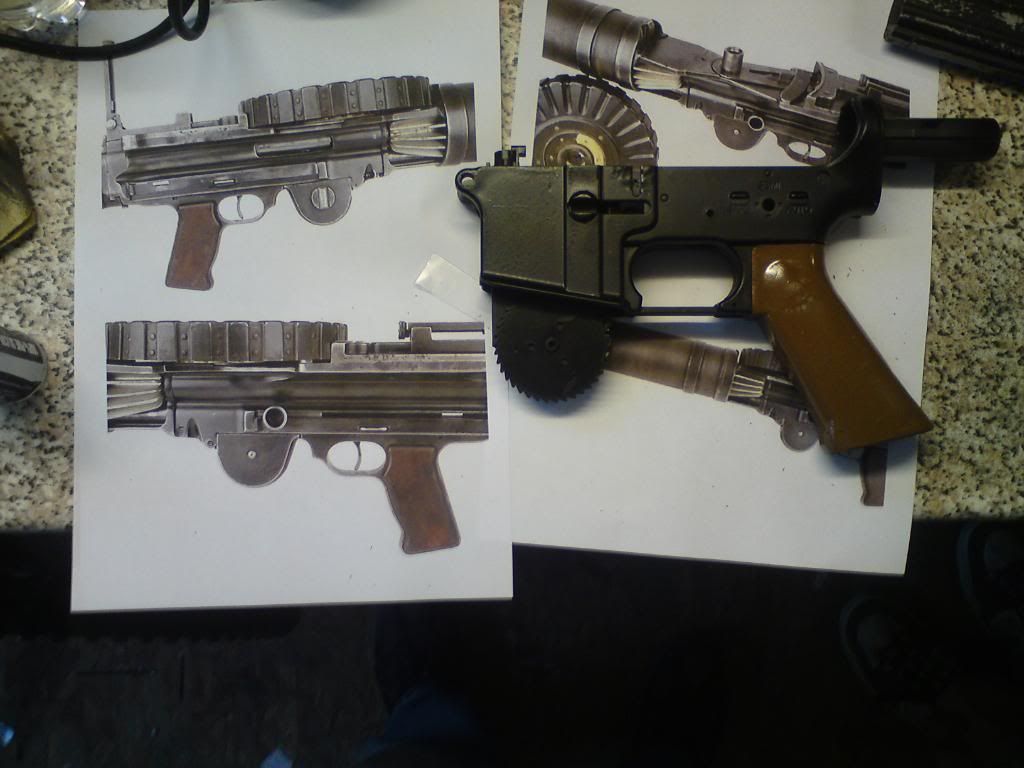
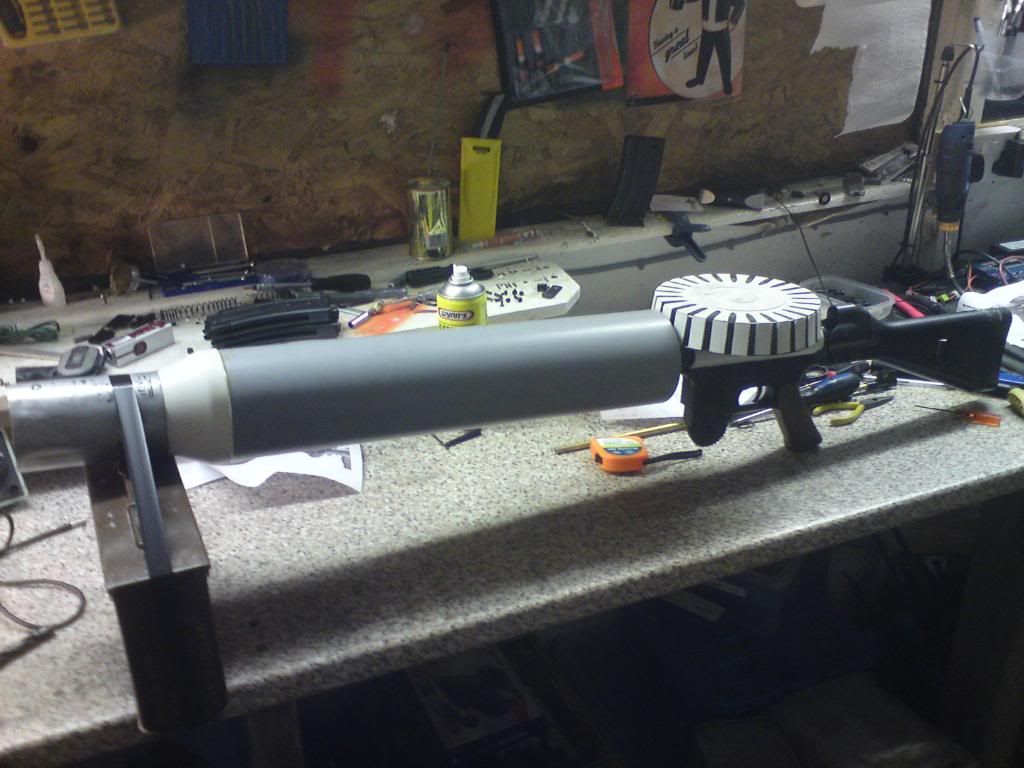
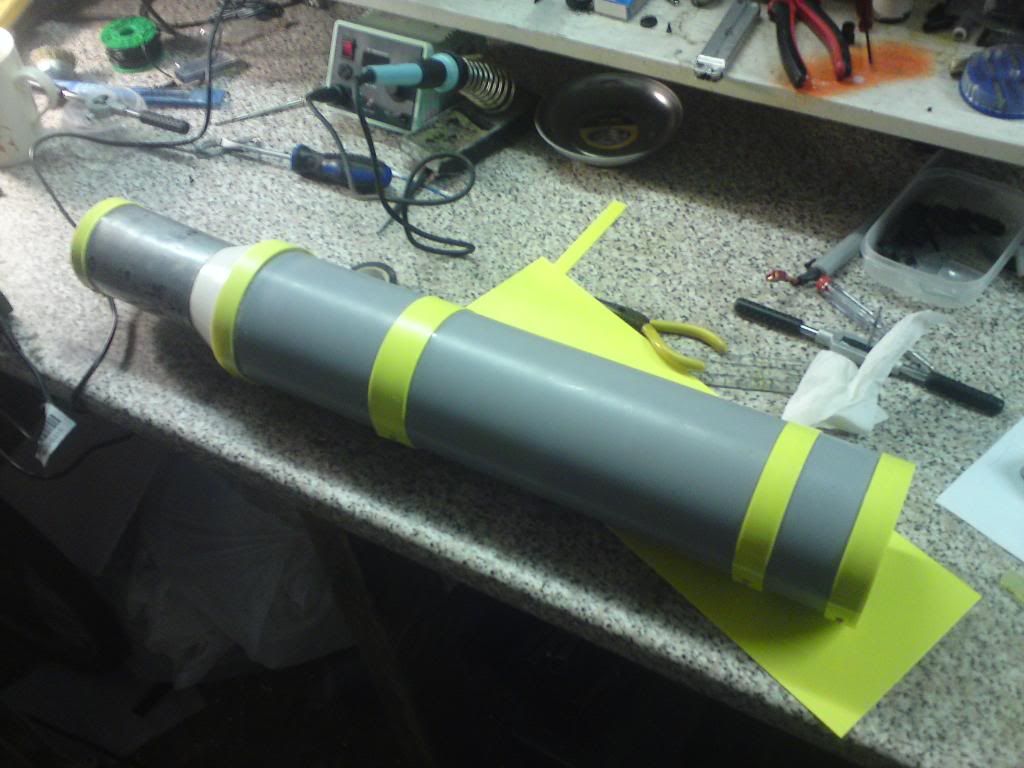
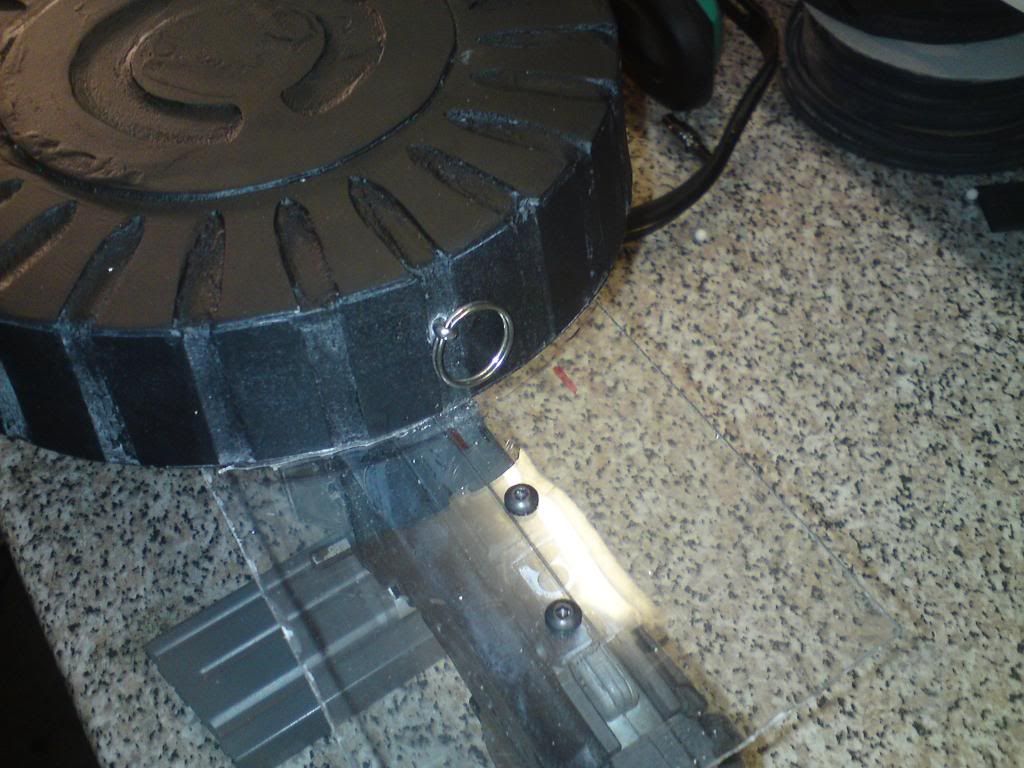
And together
quick mock up with an old stock to get a feel for the whole 50" that is a lewis gun!
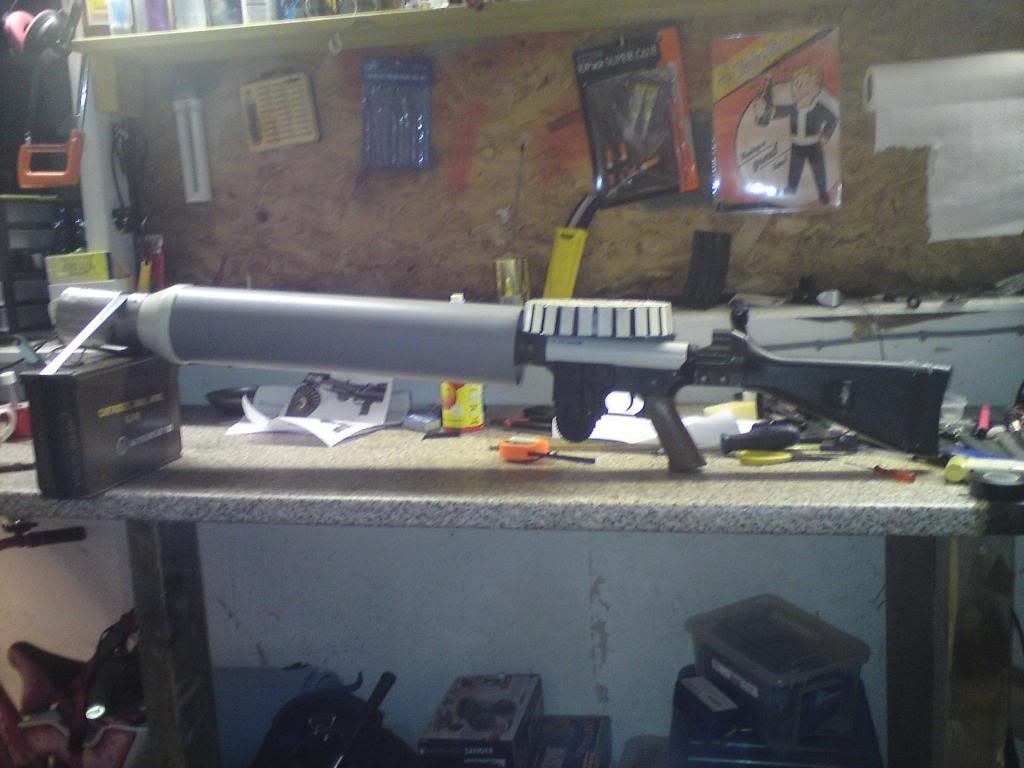
Gonna cut the barrel bands and heat sink fins tomorrow, will have more pics soon ![]() sorry for the upside down pics photobucket's on the fritz!
sorry for the upside down pics photobucket's on the fritz!
Comments welcome
Thanks
K_K

Splendid - we had a similar effort made by the Ford boys at Sealion. made with an M16 i believe - the shroud over the barrel does give a very satisfying sound.
As regards your french resistance loadout, you can easily make some FFI (I did) armbands which go with any periodish civvy clothing. i just got some cotton material painted the blue and red (for the tricolour) with some fabric paint and used a clothing pen to do the FFI logo and the cross of lorraine - most original ones were home made anyway.
I'm a hero with coward's legs.


You forgot the necessary white flag, to OP I wish you all the best of luck fella, the barrel shroud is the easiest way to go.


Thanks, Don't worry gents we'll be packing white flags to use when respawning ![]() Do you have any pics of that lewis gun?
Do you have any pics of that lewis gun?
Thanks
Dave
if you look on the OP sealion threads its there somewhere, plus the vickers that was made.
I'm a hero with coward's legs.

if you look on the OP sealion threads its there somewhere, plus the vickers that was made.
I thought it was an M1910, going by the proportions?
A Proud Member Of 'Team Spleen!' who play mainly at Gunman Airsoft, Tuddenham, Suffolk.


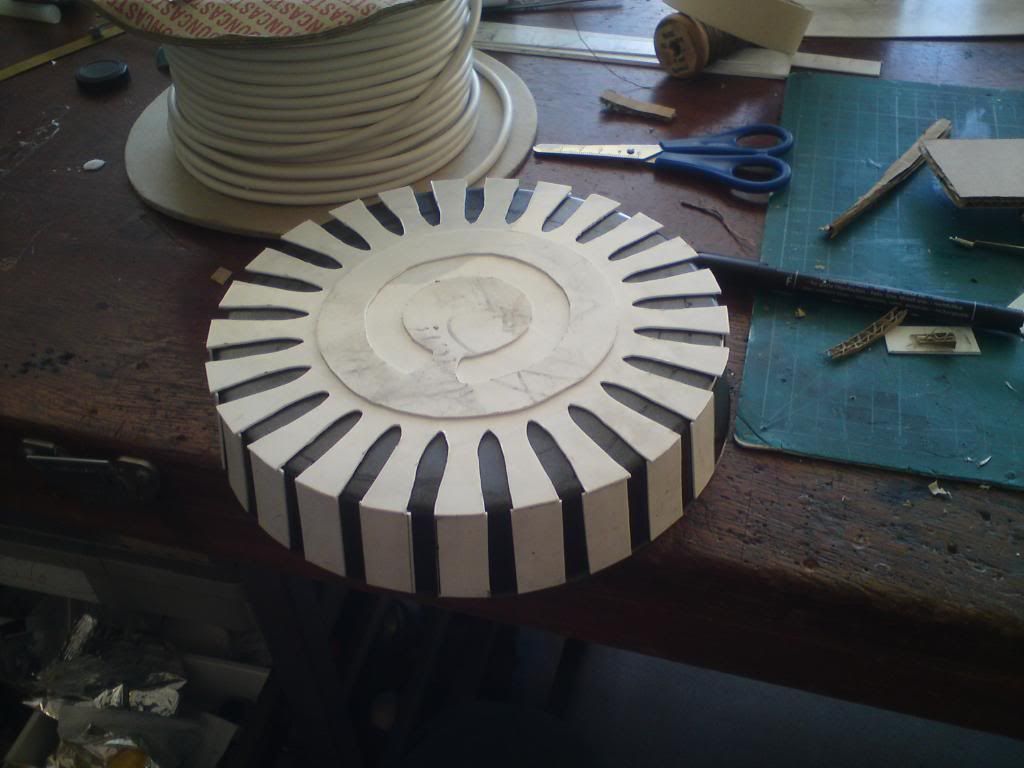
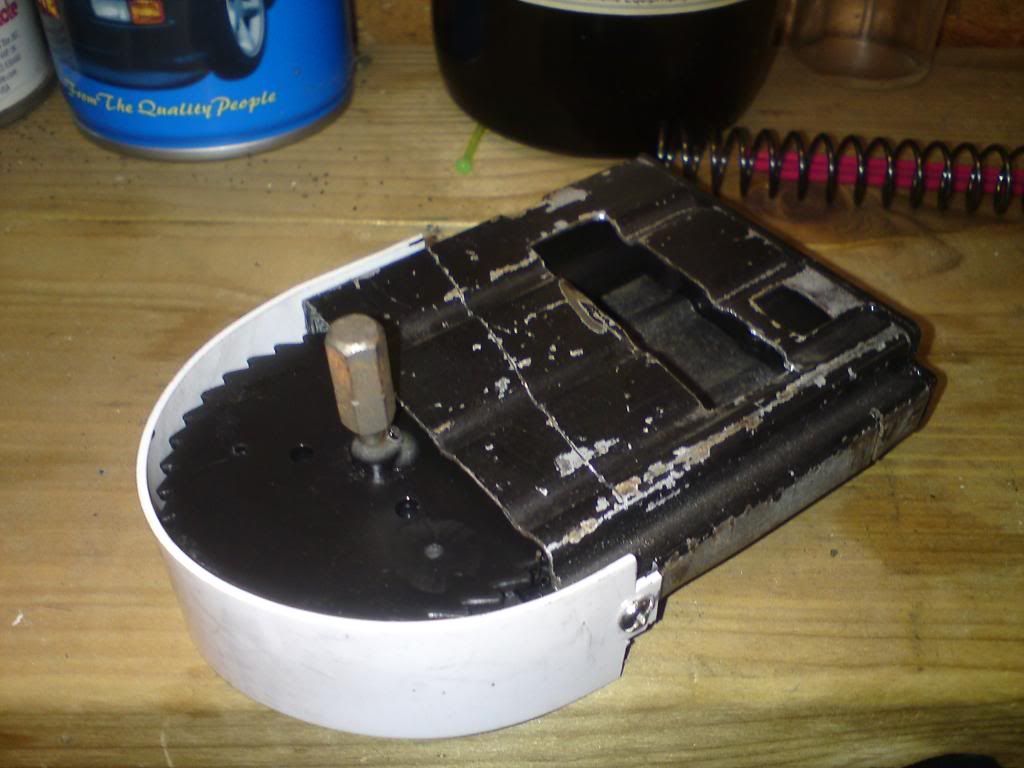
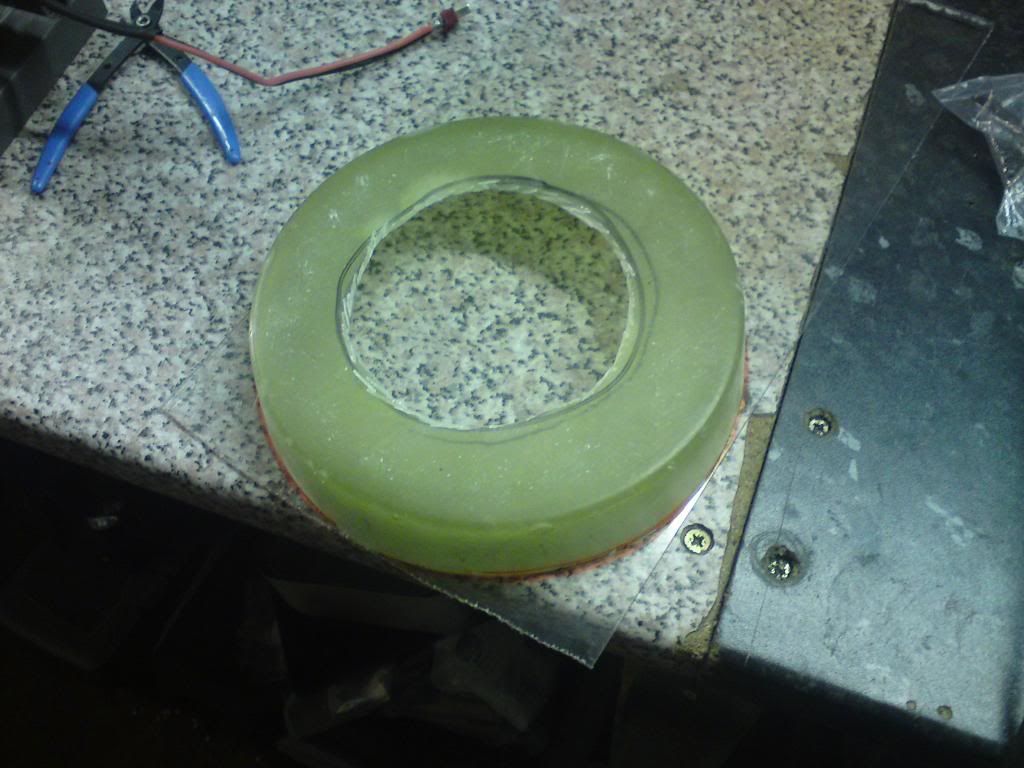
Sorry for the delay, found the plastic i was gonna use had hairline cracks in it so was no good. Moved onto the mag shell...
Mag is a disk 8" x 1.25" I wanted to make it out of an existing item rather than scratch build which led me to a 8" cake tin!
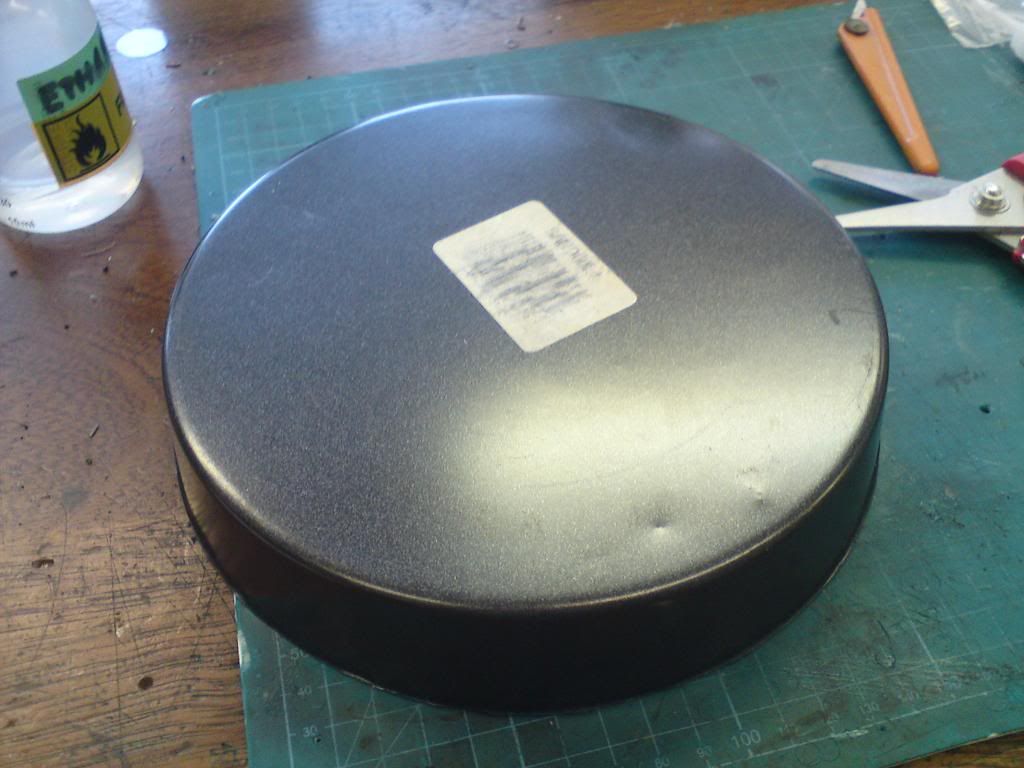
Tin (rim removed)
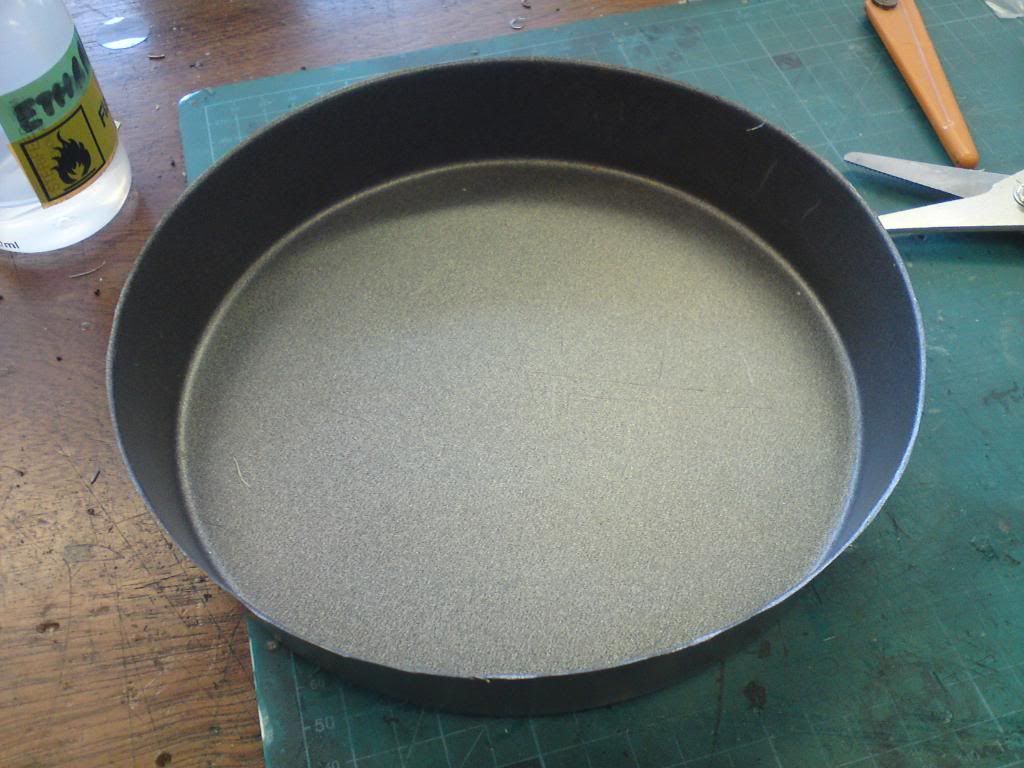
looks more flared in the picture than in the flesh. only about 1/4 inch between top and bottom radius
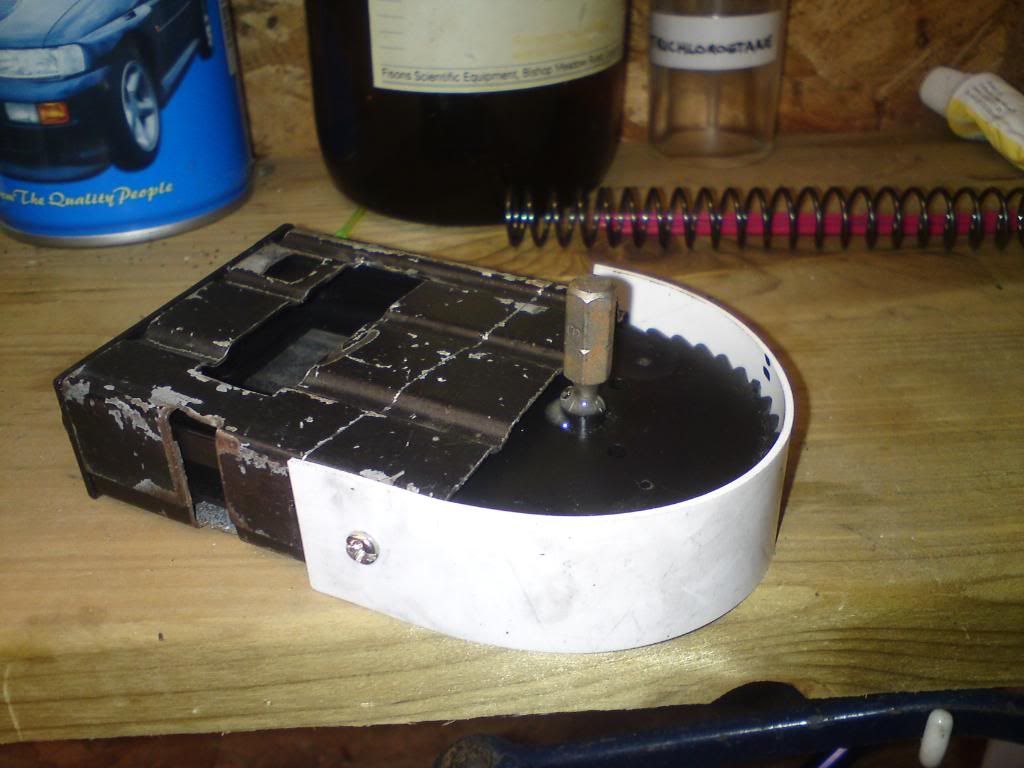
Other way up
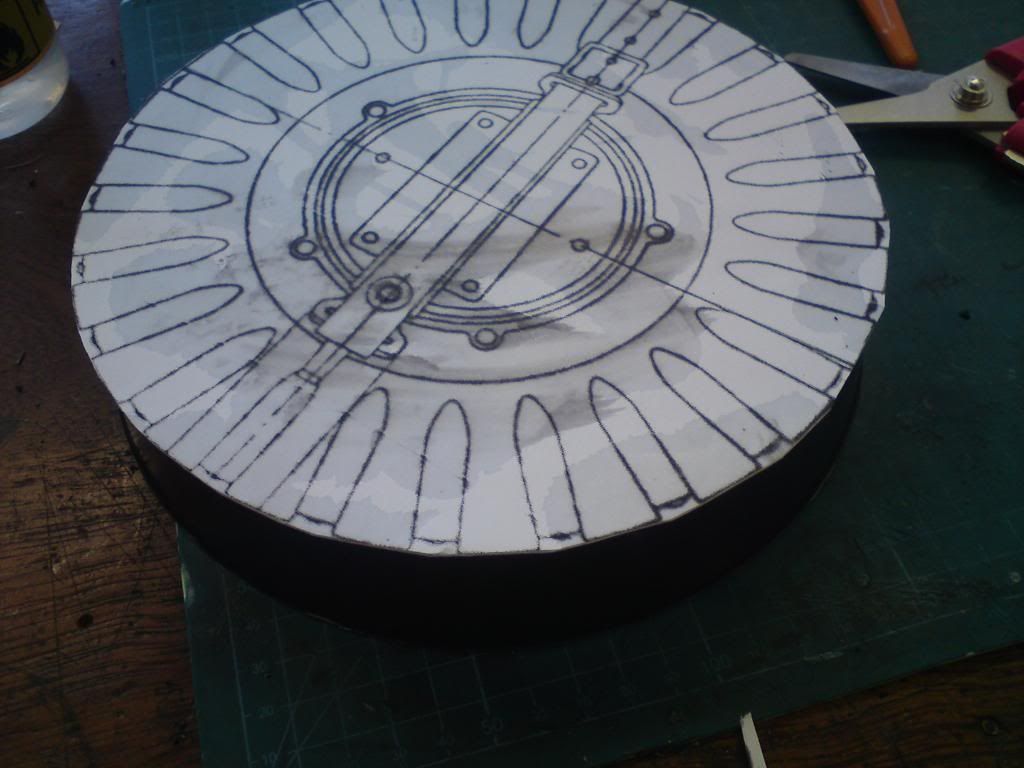
Printed and scaled a engineers drawing of the 97rnd drum, mines a 47. only difference is height and addition of a leather loop. Image has been glued to some 1mm HIPS to act as a template.
more to come soon...
Bit more done to the mag. Needs a trim and filler to smooth the contours and look like stamped metal.
Getting there slowly.....
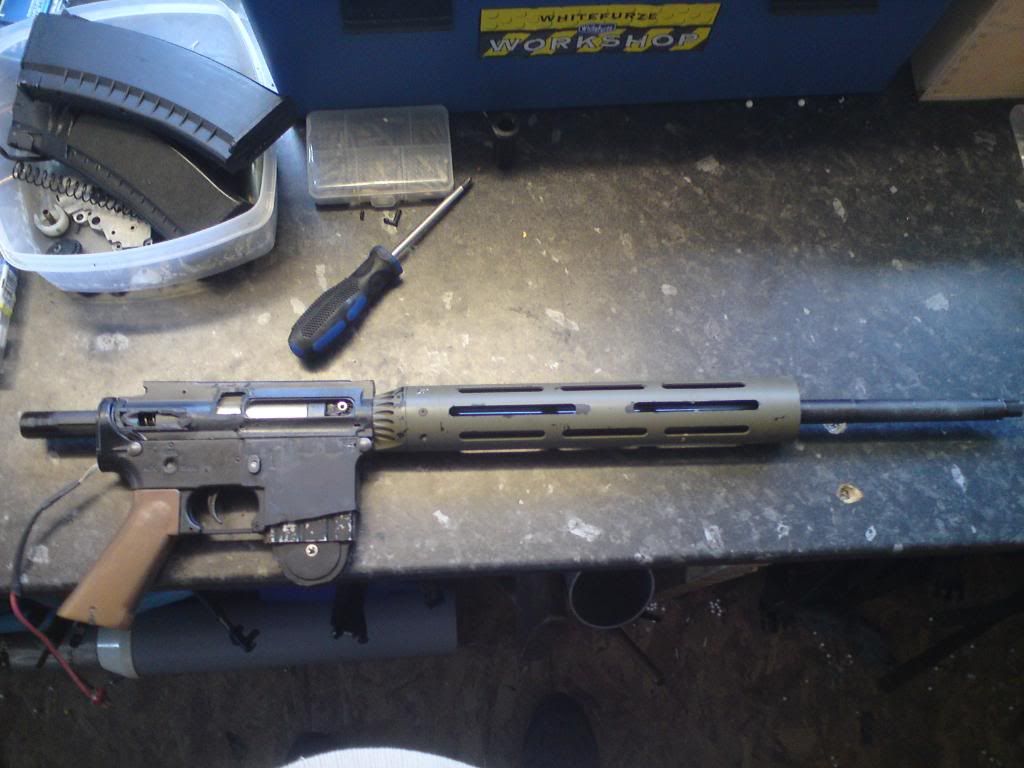
Righty ho gent's got a couple more hours in on the old beast. It now fires (very loudly!) at 320fps and managed to get the front end on temporarily. Still need to expanding foam it for strength.
Time for some pics...
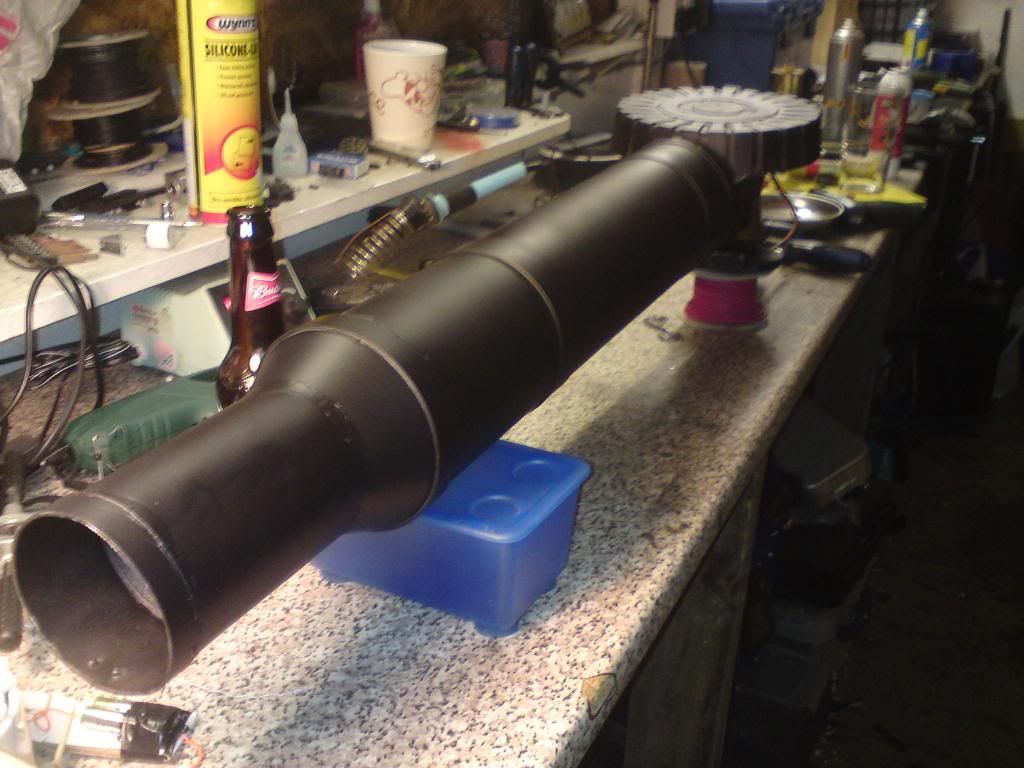
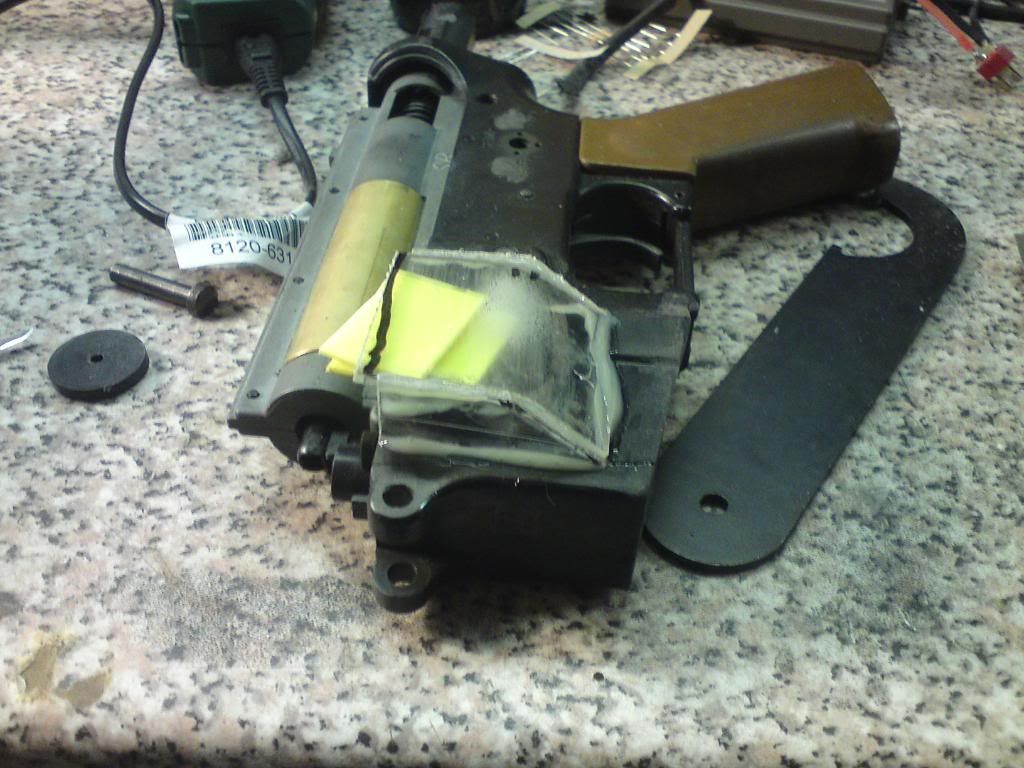
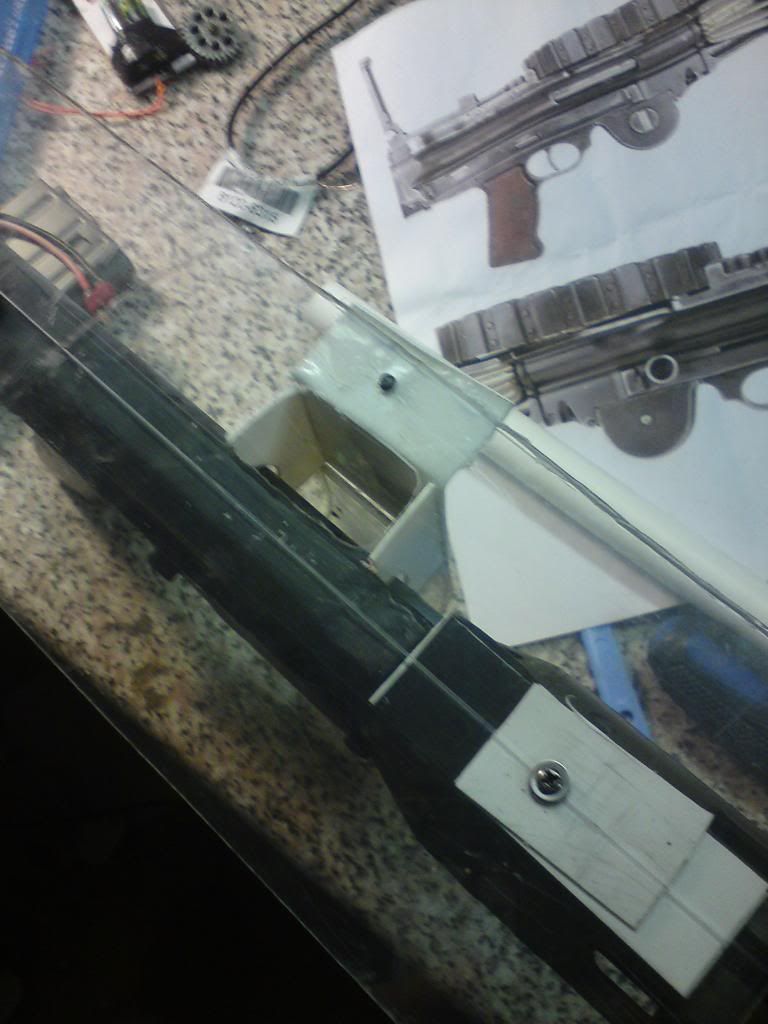
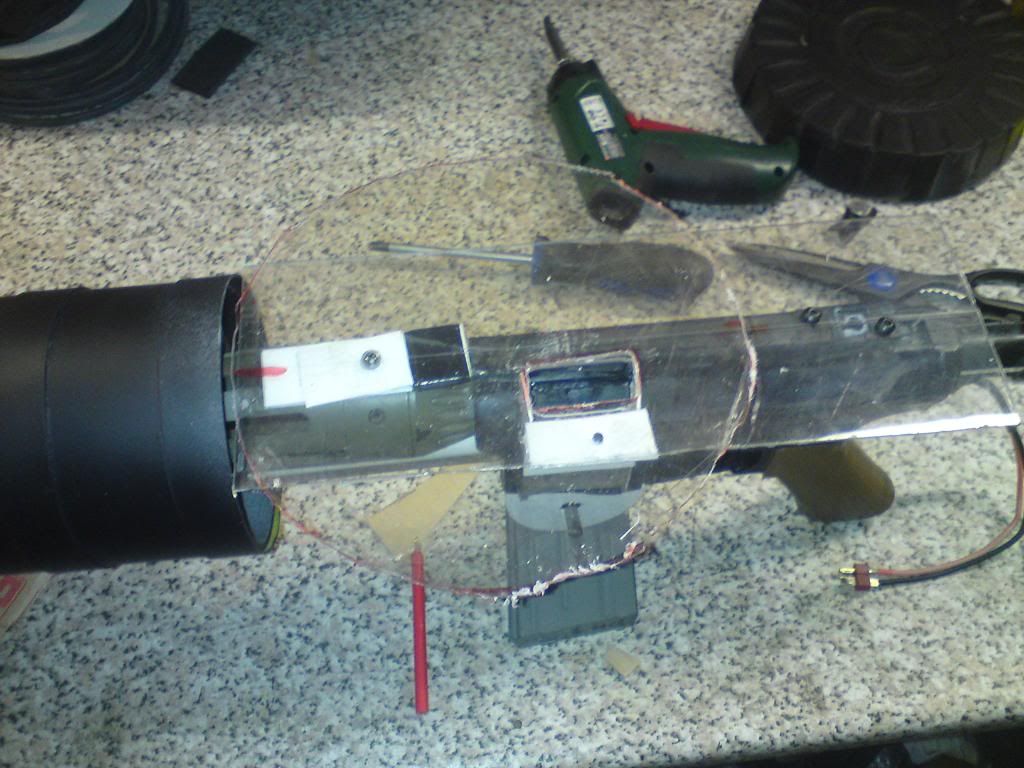
Got a JP/bush master front end thing out of the spares bin. It's perfect as a internal base for the heat shield...
Sorry for the crappy pic! Added foam spacers to centralize the heat shield and my own version of the Madbull ultimate sound amp thing made from a pop bottle and a cut down M249 mk1 flash hider. Ugly as hell but is hidden by the heat shield and REALLY works. Receiver is starting to take shape with the addition of cut down tubing on each side.
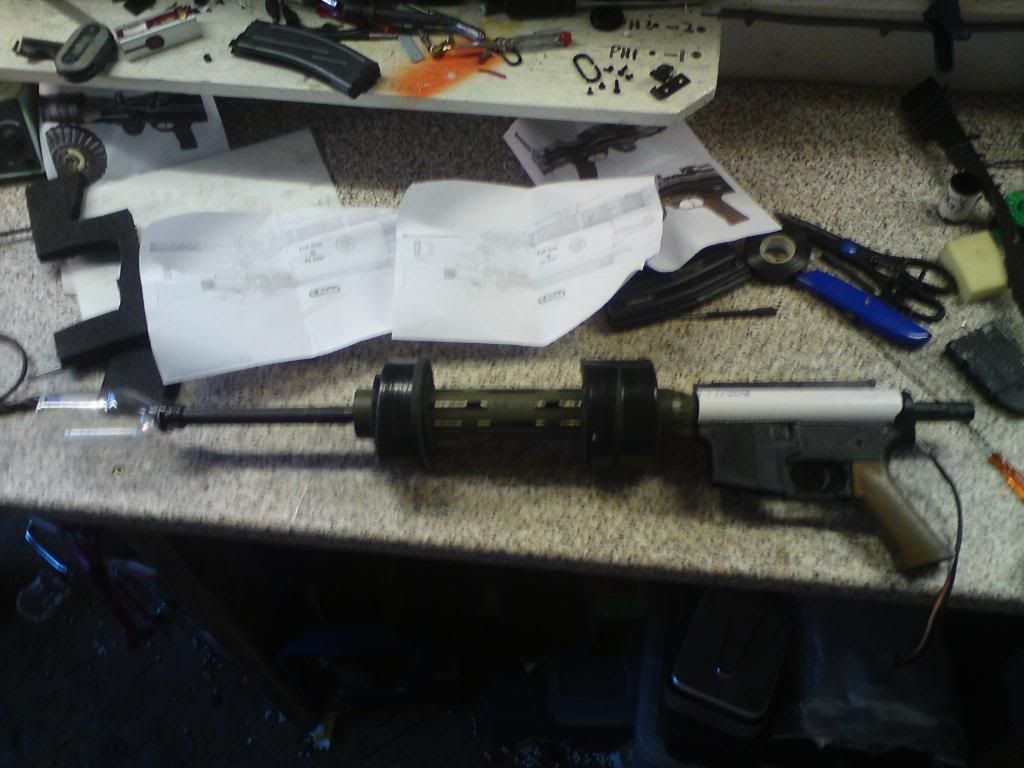
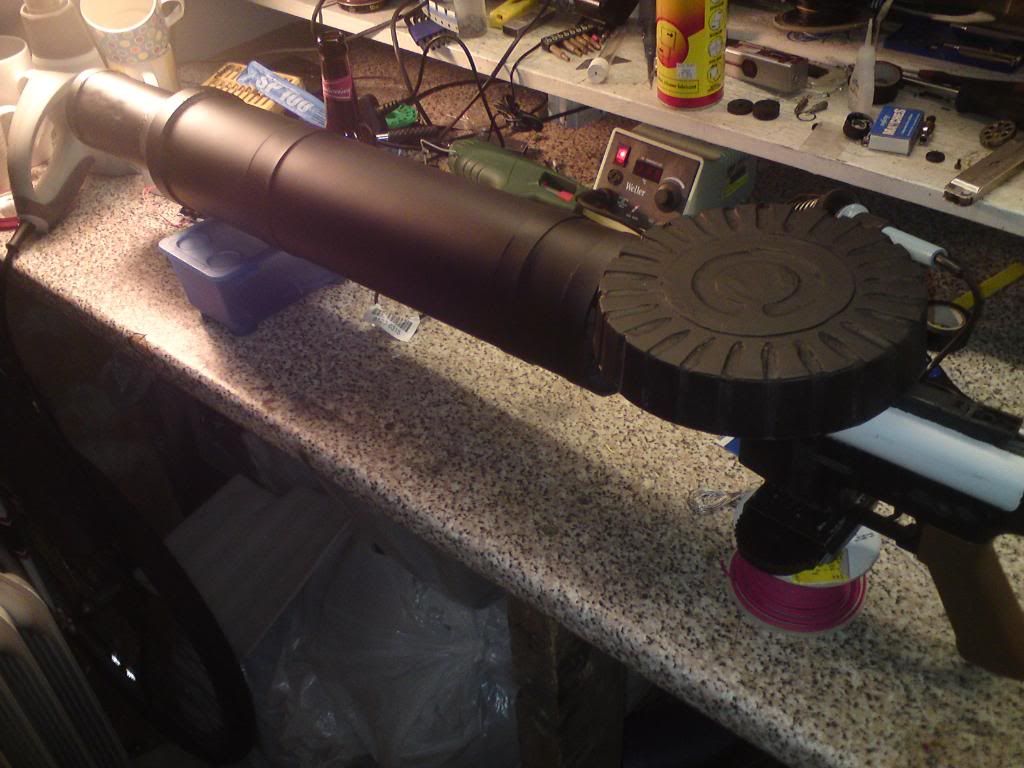
Heat shield added to test fit. Found out that the pop bottle needs to be longer (500ml type) to fit properly with front end dimensions. Will be changed before foaming.
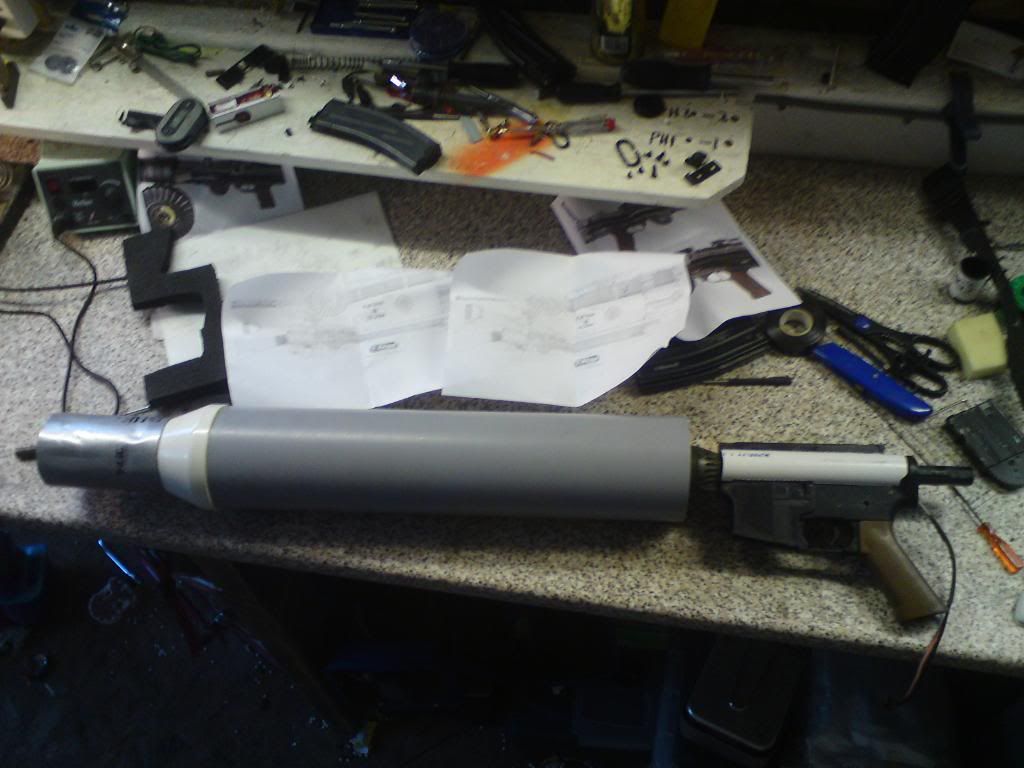
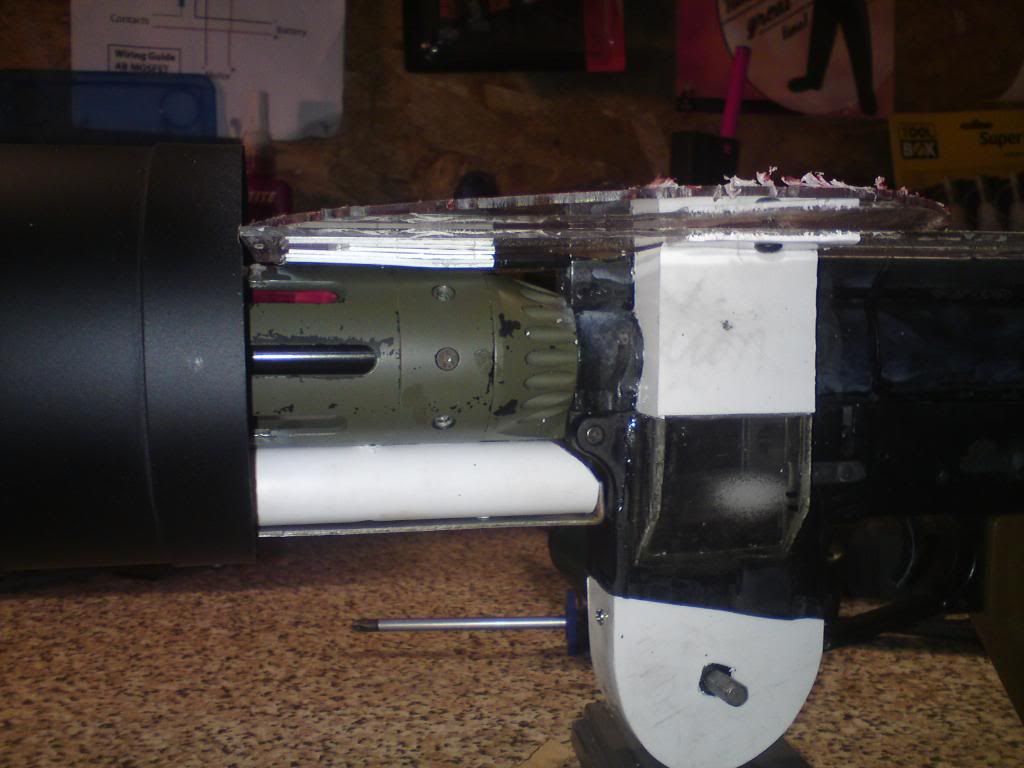
Dangerous end showing amplifier cone, please not that the jagged white area is in the process of grinding down, and yes that's duct tape wrapped round! Outer edge is quite beat up but the whole gun is getting abusive ride on the weathering train when it's done ![]()

A few scale shots, it's huge!...
Our support gunner holding it. He's 5'10" ish
Against my M16
And finally some more mock ups with the un finished mag and temp stock....
Need to tweak the dimensions a little to get the length right. The front end needs to move away from the body to accommodate cooling fins and I need to start on the stock next I think and fill and sand the mag shell.
She's looking pretty darn rough atm but we're getting there slowly...
Let me know what you think
Ta
Dave

Its getting there ![]()

Free speech is expensive these days!


Love it
Do checkout the Sealion thread for info on their build as it was a real good effort 


Had a good look, top effort!
This bloody gun is massive, need to get a bigger shed!
Cor it's been a while! Bit of an update for you gents....
Got the mag back from the fiberglasser (my mate Matt) and got my support gunner Rob to fill and sand the mag to give it a more pressed steel look. Then I got some 1mm HIPS sheet and started to make the barrel bands
Strips are screwed at the join underneath and glued on.

After 2 coats of primer and the first of 3 colours (Black, Pewter, Silver) applied
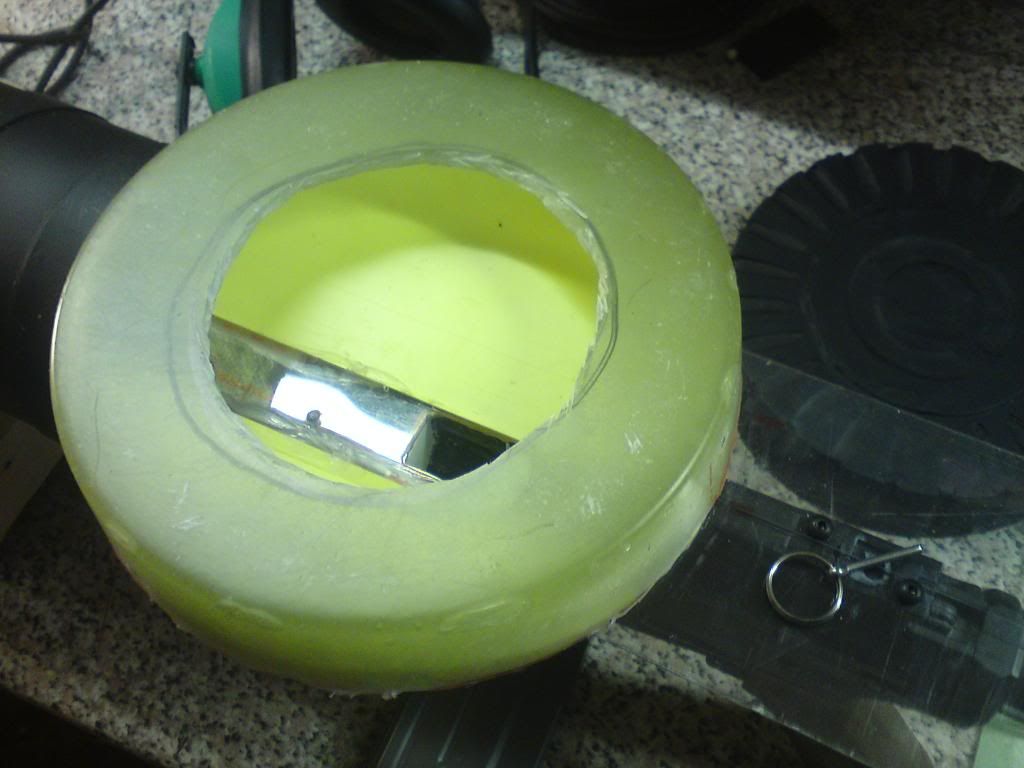
Started on the feed channel for the top mounted mag. 2mm polycarbonate epoxy'd in place. Quite proud of the receiver but it shouldn't look to bad when in play. Also note it stops in line with the split body. Want to keep the tip up feature of the AR for cleaning and repair.
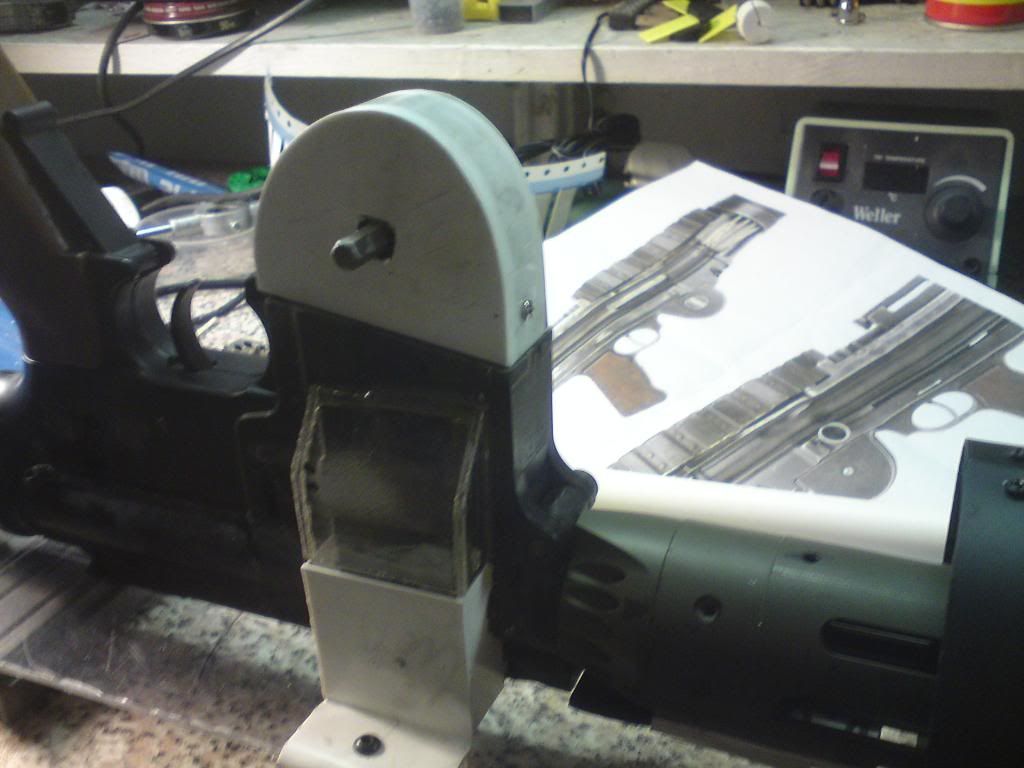
Started the case that the hicap internals will sit in. Trying to replicate the "hump" on the Lewis as closely as possible. The Allen bit is there as part of the wind key I have planned.
The cut out lines up nicely with the receiver and is 40mmx10mm for reliable feeding i hope ![]()
Also made a start on the fore sight. It'll be disguised nicely with body filler and plastic sheet ![]()
Choppy chop
That's all for now folks. Comments welcome
Thanks
Dave
Good progress!! Wish the same could be said for my current project ![]()
UPDATE
Added the sides to the wind mech. Need to put a small winder on the Allen bit. gonna leave a small length of it exposed for quick winding in the field (electric screwdriver!)
Inside the mag well. just to show the ammo chute

Upper chute and polycarbonate receiver top. Using m4 pan head allen bolts and glue where permanent joins are needed and just Allen bolts where access is required.
And with hicap in, may pack out the walls with plastic for extra width.
Inner mag shell. This will form the body of the hopper, the tin shell is just a lid. The base of it is made from 2mm polycarbonate with 1mm HIPS as the ramps.
Rough cut base mounted on the receiver for measuring,
Added a gas tube and lower bracket. This acts as an anchor point for the outer barrel. Removable with 3 screws for easy take down.
Mag internals now all in place. Two shallow ramps act to funnel rounds into the chute. First tests are good. shot ~1000rounds in one hit and didn't have any feeding problems. Only a few rounds remained in the hopper at the end
With the lid on
lid is held in place with a split pin. Works really well
So far I'm really pleased with the progress, saying that it is at the crappy looking stage atm. It NEEDS a damn good painting soon but I still have loads of receiver details to add first. Off to town today for paint glue and expanding foam. Will add more later today if possible
Comments welcome as always
Ta
Dave
Did some more today. Only had an hour of so to work on it today (with the help of Rob)
Anyway, Time for today's update ![]()
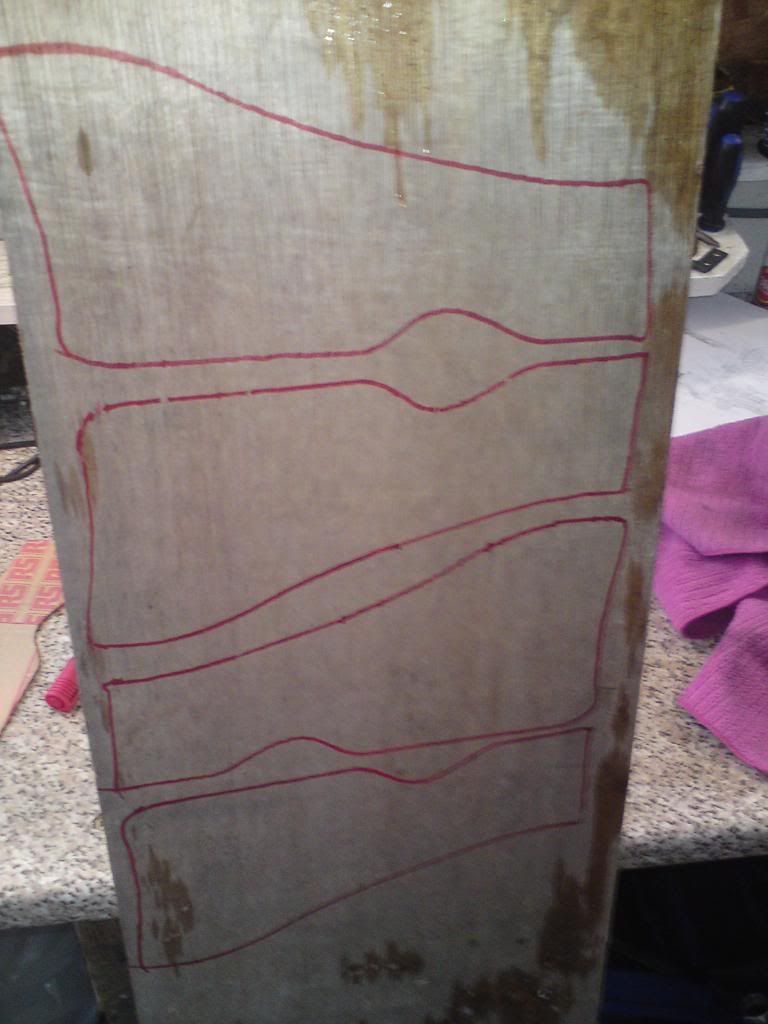
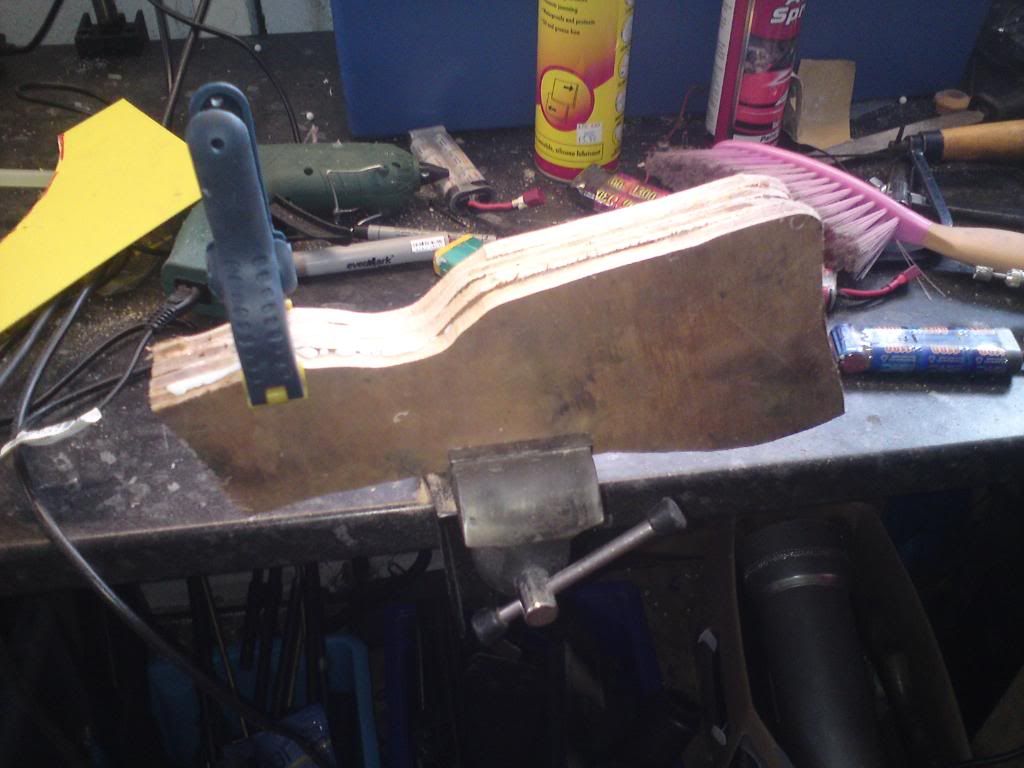
Started on the stock.
Scale up a picture (in my case an engineers drawing) and make a template. Copy 4 times onto 9mm ply, like so
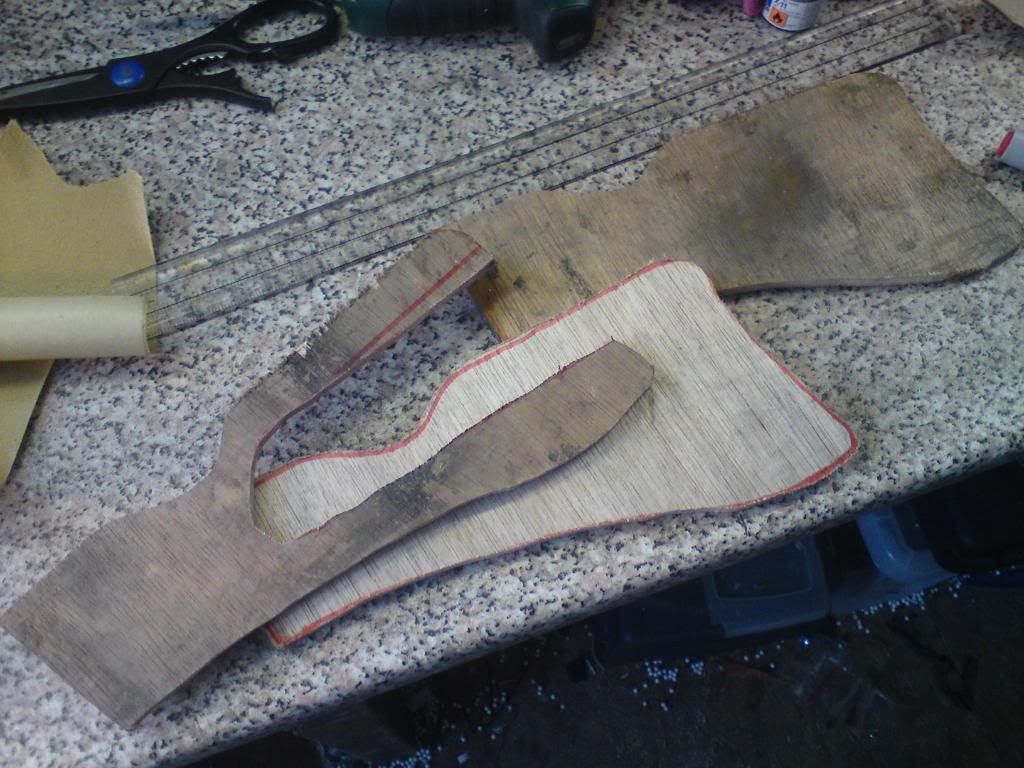
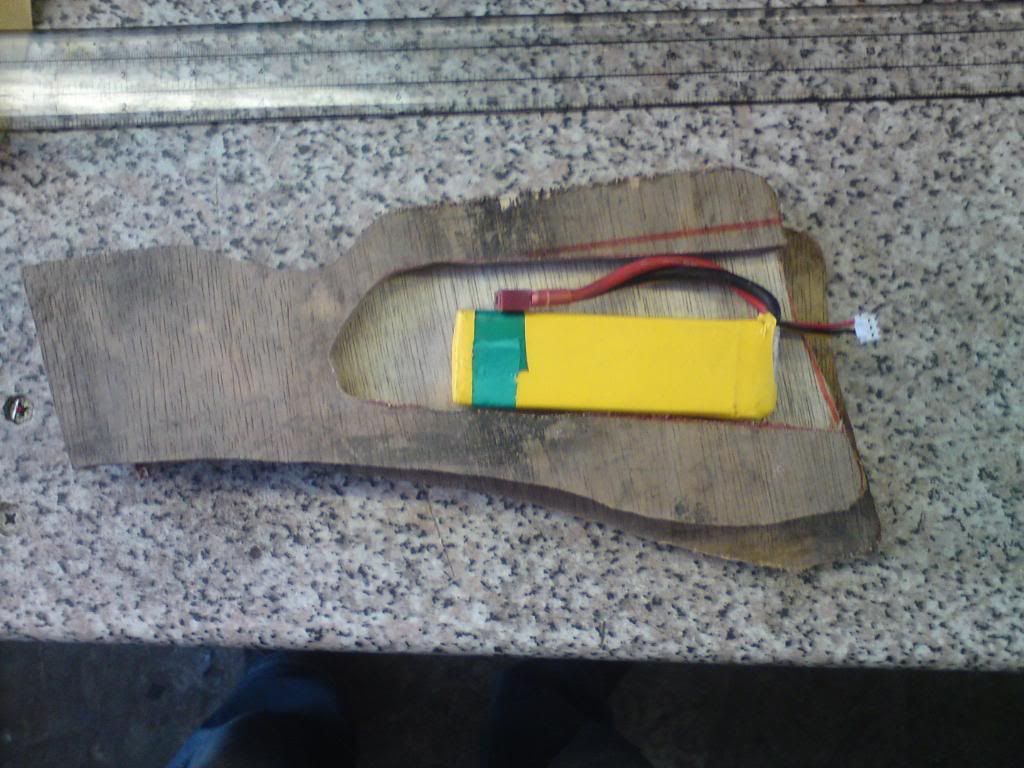
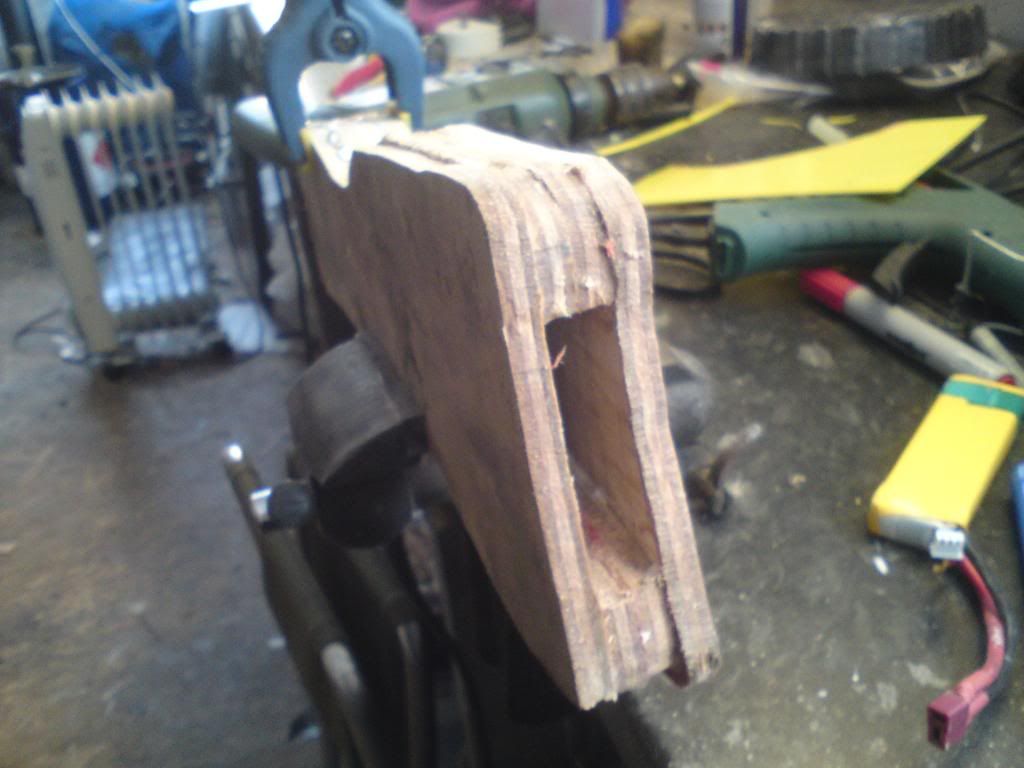
Get your mate to cut it all out by hand! ![]() then make a space for the battery in two of the pieces.
then make a space for the battery in two of the pieces.
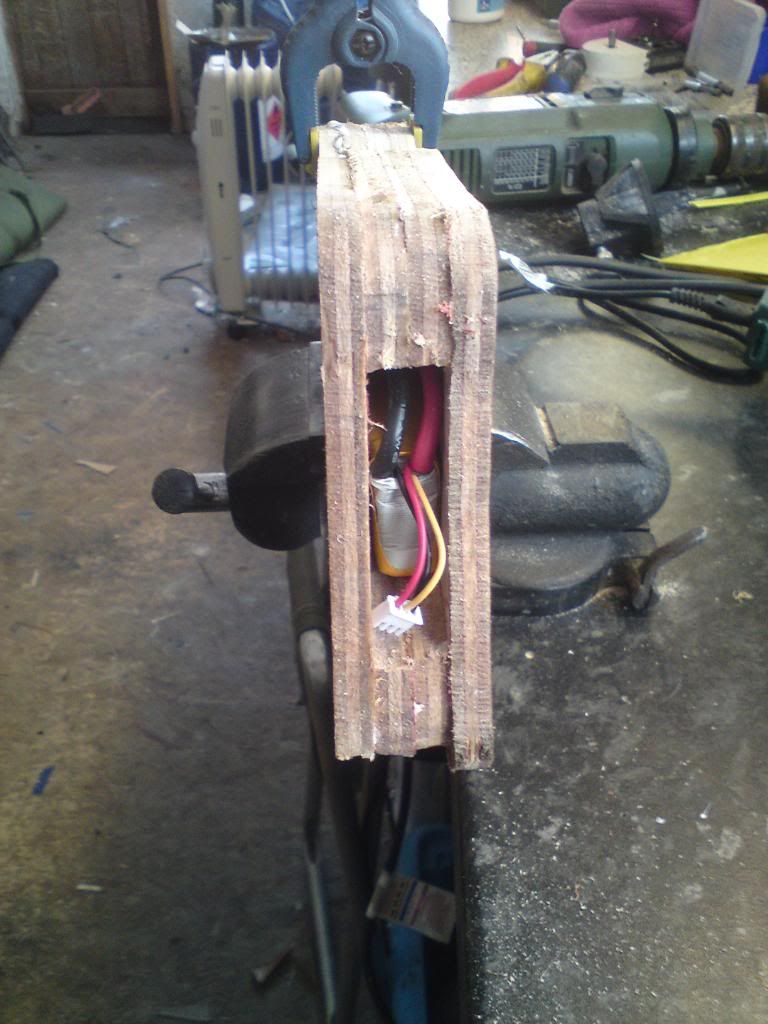
Check that the battery fits!
Then pin and glue it together.
Battery compartment
and with battery in place.
Once it's all dry it's going to take one hell of a lot of dremeling to get the rough shape then a good few hours of sanding to get the desired shape. It'll be worth it tho, looking forward to getting it mounted and making the but plate ![]()
Also did some front end work but that's still in progress and I'll post when it's done.
Enjoy ![]()
You might want to try a spokeshave or block plane for the roughing.
I built a hollow (battery space) stock like this before, except that I cut out the outer profile after, the multi-laminate was all glued together.
A Proud Member Of 'Team Spleen!' who play mainly at Gunman Airsoft, Tuddenham, Suffolk.
This looks absolutely amazing! I'd have to admit, i was a bit skeptical when you were starting the build (probably due to my intense dislike of the M4 and not in anyway doubting your skills) but this is turning out great! Good luck and i hope you finish it soon. ![]()
I'd have made the centre laminations in 2 parts to form the wiring channel.